
iRegatta 2 usersguide
This manual may not always be up to date with the latest version of iRegatta 2 available in Apples App Store, as minor additions or bug fixes may be published
without updating the manual, or be slightly out of sync with updates to the manual.
Table of Content
- General
- Disclaimer
- Map options
- Main view features
- Visualization options
- Readouts and Graphs
- Waypoints and Routes
- Tracking
- Polars
- Race Control
General
iRegatta 2 is an iPad-only map-centric navigation aid, especially targeting regatta sailors, but also helpful for cruisers.
To get the most out of iRegatta 2, you should upload a polar file for your boat, or even better several polar files for different sail configurations.
Disclaimer
NO WARRANTY AND DISCLAIMER. YOU EXPRESSLY ACKNOWLEDGE AND AGREE THAT USE OF THIS APPLICATION IS AT YOUR SOLE RISK AND THAT THE ENTIRE RISK AS TO SATISFACTORY QUALITY, PERFORMANCE, SAFETY, ACCURACY AND EFFORT IS WITH YOU. TO THE MAXIMUM EXTENT PERMITTED BY APPLICABLE LAW, THIS APPLICATION IS PROVIDED ”AS IS” AND ”AS AVAILABLE,”+ WITH ALL FAULTS AND WITHOUT WARRANTY OF ANY KIND. ZIFIGO HEREBY DISCLAIMS ALL REPRESENTATIONS, WARRANTIES AND CONDITIONS WITH RESPECT TO THIS APPLICATION, EITHER EXPRESS, IMPLIED OR ARISING BY LAW, INCLUDING, BUT NOT LIMITED TO, THE IMPLIED WARRANTIES AND/OR CONDITIONS OF MERCHANTABILITY, FITNESS FOR A PARTICULAR PURPOSE, ACCURACY, COMPLETENESS, QUIET ENJOYMENT, AND NON-INFRINGEMENT OF THIRD PARTY RIGHTS. ZIFIGO DOES NOT WARRANT THAT THE FUNCTIONS CONTAINED IN THIS APPLICATION WILL BE ACCURATE OR MEET YOUR REQUIREMENTS, THAT THE OPERATION OF THIS APPLICATION WILL BE UNINTERRUPTED OR ERROR-FREE, OR THAT DEFECTS IN THIS APPLICATION WILL BE CORRECTED. NO ORAL OR WRITTEN INFORMATION, GUIDELINES OR ADVICE GIVEN BY ZIFIGO SHALL CREATE A WARRANTY. YOU FURTHER ACKNOWLEDGE THAT THIS APPLICATION AND RELATED SERVICES ARE NOT INTENDED AS OR SUITABLE FOR USE IN SITUATIONS OR ENVIRONMENTS WHERE THE FAILURE OR TIME DELAYS OF, OR ERRORS OR INACCURACIES IN THE CONTENT, DATA OR INFORMATION PROVIDED BY THIS APPLICATION OR SERVICES COULD LEAD TO DEATH, PERSONAL INJURY, OR SEVERE PHYSICAL OR ENVIRONMENTAL DAMAGE, INCLUDING WITHOUT LIMITATION NAUTICAL NAVIGATION OR VESSEL TRAFFIC CONTROL SYSTEMS.
LOCATION DATA PROVIDED BY THIS APPLICATION OR ANY SERVICES ARE FOR SITUATIONAL AWARENESS PURPOSES ONLY AND NOT INTENDED FOR NAUTICAL NAVIGATION AND NOT INTENDED TO BE RELIED UPON IN SITUATIONS WHERE PRECISE LOCATION INFORMATION IS NEEDED OR WHERE ERRONEOUS, INACCURATE, TIME-DELAYED OR INCOMPLETE LOCATION DATA COULD LEAD TO DEATH, PERSONAL INJURY, PROPERTY OR ENVIRONMENTAL DAMAGE, OR VIOLATION OF LAWS OR ANY OTHER APPLICABLE MARITIME REGULATIONS. ZIFIGO DOES NOT WARRANT THE AVAILABILITY, ACCURACY, COMPLETENESS, RELIABILITY, OR TIMELINESS OF LOCATION DATA OR ANY OTHER DATA DISPLAYED BY THIS APPLICATION OR SERVICES. USE OF THIS LOCATION DATA IS AT YOUR SOLE RISK.
NAUTICAL NAVIGATION IS AN INHERENTLY DANGEROUS ACTIVITY AND SHOULD ONLY BE ENGAGED IN BY PERSONS WITH ADEQUATE TRAINING AND EXPERIENCE.
THIS APPLICATION MAY NOT CONTAIN ALL NAUTICAL NAVIGATION DATA NEEDED FOR SAFE NAUTICAL NAVIGATION. ONLY CURRENT OFFICIAL GOVERNMENT CHARTS AND NOTICES TO MARINERS CONTAIN ALL INFORMATION NEEDED FOR SAFE NAUTICAL NAVIGATION.
THIS APPLICATION IS NOT ADEQUATE AS A PRIMARY MEANS OF NAVIGATION, AND SHOULD BE USED ONLY AS A SUPPLEMENT TO OFFICIAL GOVERNMENT CHARTS AND TRADITIONAL NAVIGATION METHODS TO AID IN SITUATIONAL AWARENESS OF THE SURROUNDING ENVIRONMENTAL CONDITIONS.
ZIFIGO IS NOT RESPONSIBLE FOR DEFECTS IN THIS APPLICATON DUE TO INCORRECT OR MISSING INFORMATION FROM CHART PROVIDORS OR OTHER THIRD PARTY SOURCES.
NO LICENSOR HAS VERIFIED THIS APPLICATION AND NO LICENSOR ACCEPTS ANY LIABILITY FOR THE ACCURACY OF THIS APPLICATION OR FOR ANY MODIFICATIONS THAT MAY HAVE BEEN MADE TO THE INFORMATION SUPPLIED. FURTHERMORE, NO LICENSOR WARRANTS THAT THE DATA MEETS ANY REGULATIONS AS AN APPROPRIATE PRODUCT FOR NAVIGATION OR THAT IT CONTAINS THE MOST CURRENT HYDROGRAPHIC INFORMATION AVAILABLE.
Map Options
Maps are a central part of iRegatta2. The app offers a variety of different maps you can chose from in the settings.
- Apple maps and Satellite maps are free online maps supplied by apple, like the ones you get in the iOS Maps app.
- Wärtsilä offer two set of maps, the Auxiliary maps and the Main maps. Depending on your local waters, one might be more detailed than the other. So if you use Wärtsilä maps, check out the two options and see which one suits you best.
Wärtsilä maps require that you subscribe to Wärtsilä maps in iRegatta2. It's not the same maps as you might know from the iSailor app.
Wärtsilä maps are online maps, but with the option to cache the locally on your iPad. This means you need to be online to see the maps, but if caching is turned on, map tiles watched while online, will also be available while offline. Map tiles are basically images of the maps at the current zoom level. So you need to go through different zoom levels for an area, to make sure you have all the details stored on your device that you'll need.
This might seem a little clumsy and inconvenient, but that was the only deal I could make with Wärtsilä about using their maps. - Navionics maps are also supported by iRegatta2. These maps are the same offline maps you know from other apps using Navionics maps. These maps are rendered on demand, so if you have downloaded an area, you've got all the details you need. But some features like viewing photos of harbours etc. might require internet connection.
Water depth will adjust to your settings in "Short distance units". After changing the setting, you need to restart iRegatta2 for depth units to change.
Of cause you only got access to the areas your Navionics subscription covers.
Differences
Some things don't work the same with the Navionics maps:- The map in the start view doesn't rotate to keep the startline horizontal.
- Reviewing long tracks is quite slow in the Navionics maps. IRegatta2 will suggest to temporarily to switch to Apple maps when reviewing tracks.
- For the same reason live tracks are not available in Navionics.
- You can't drag waypoints to reposition them.
- The map in the start view doesn't rotate to keep the startline horizontal.
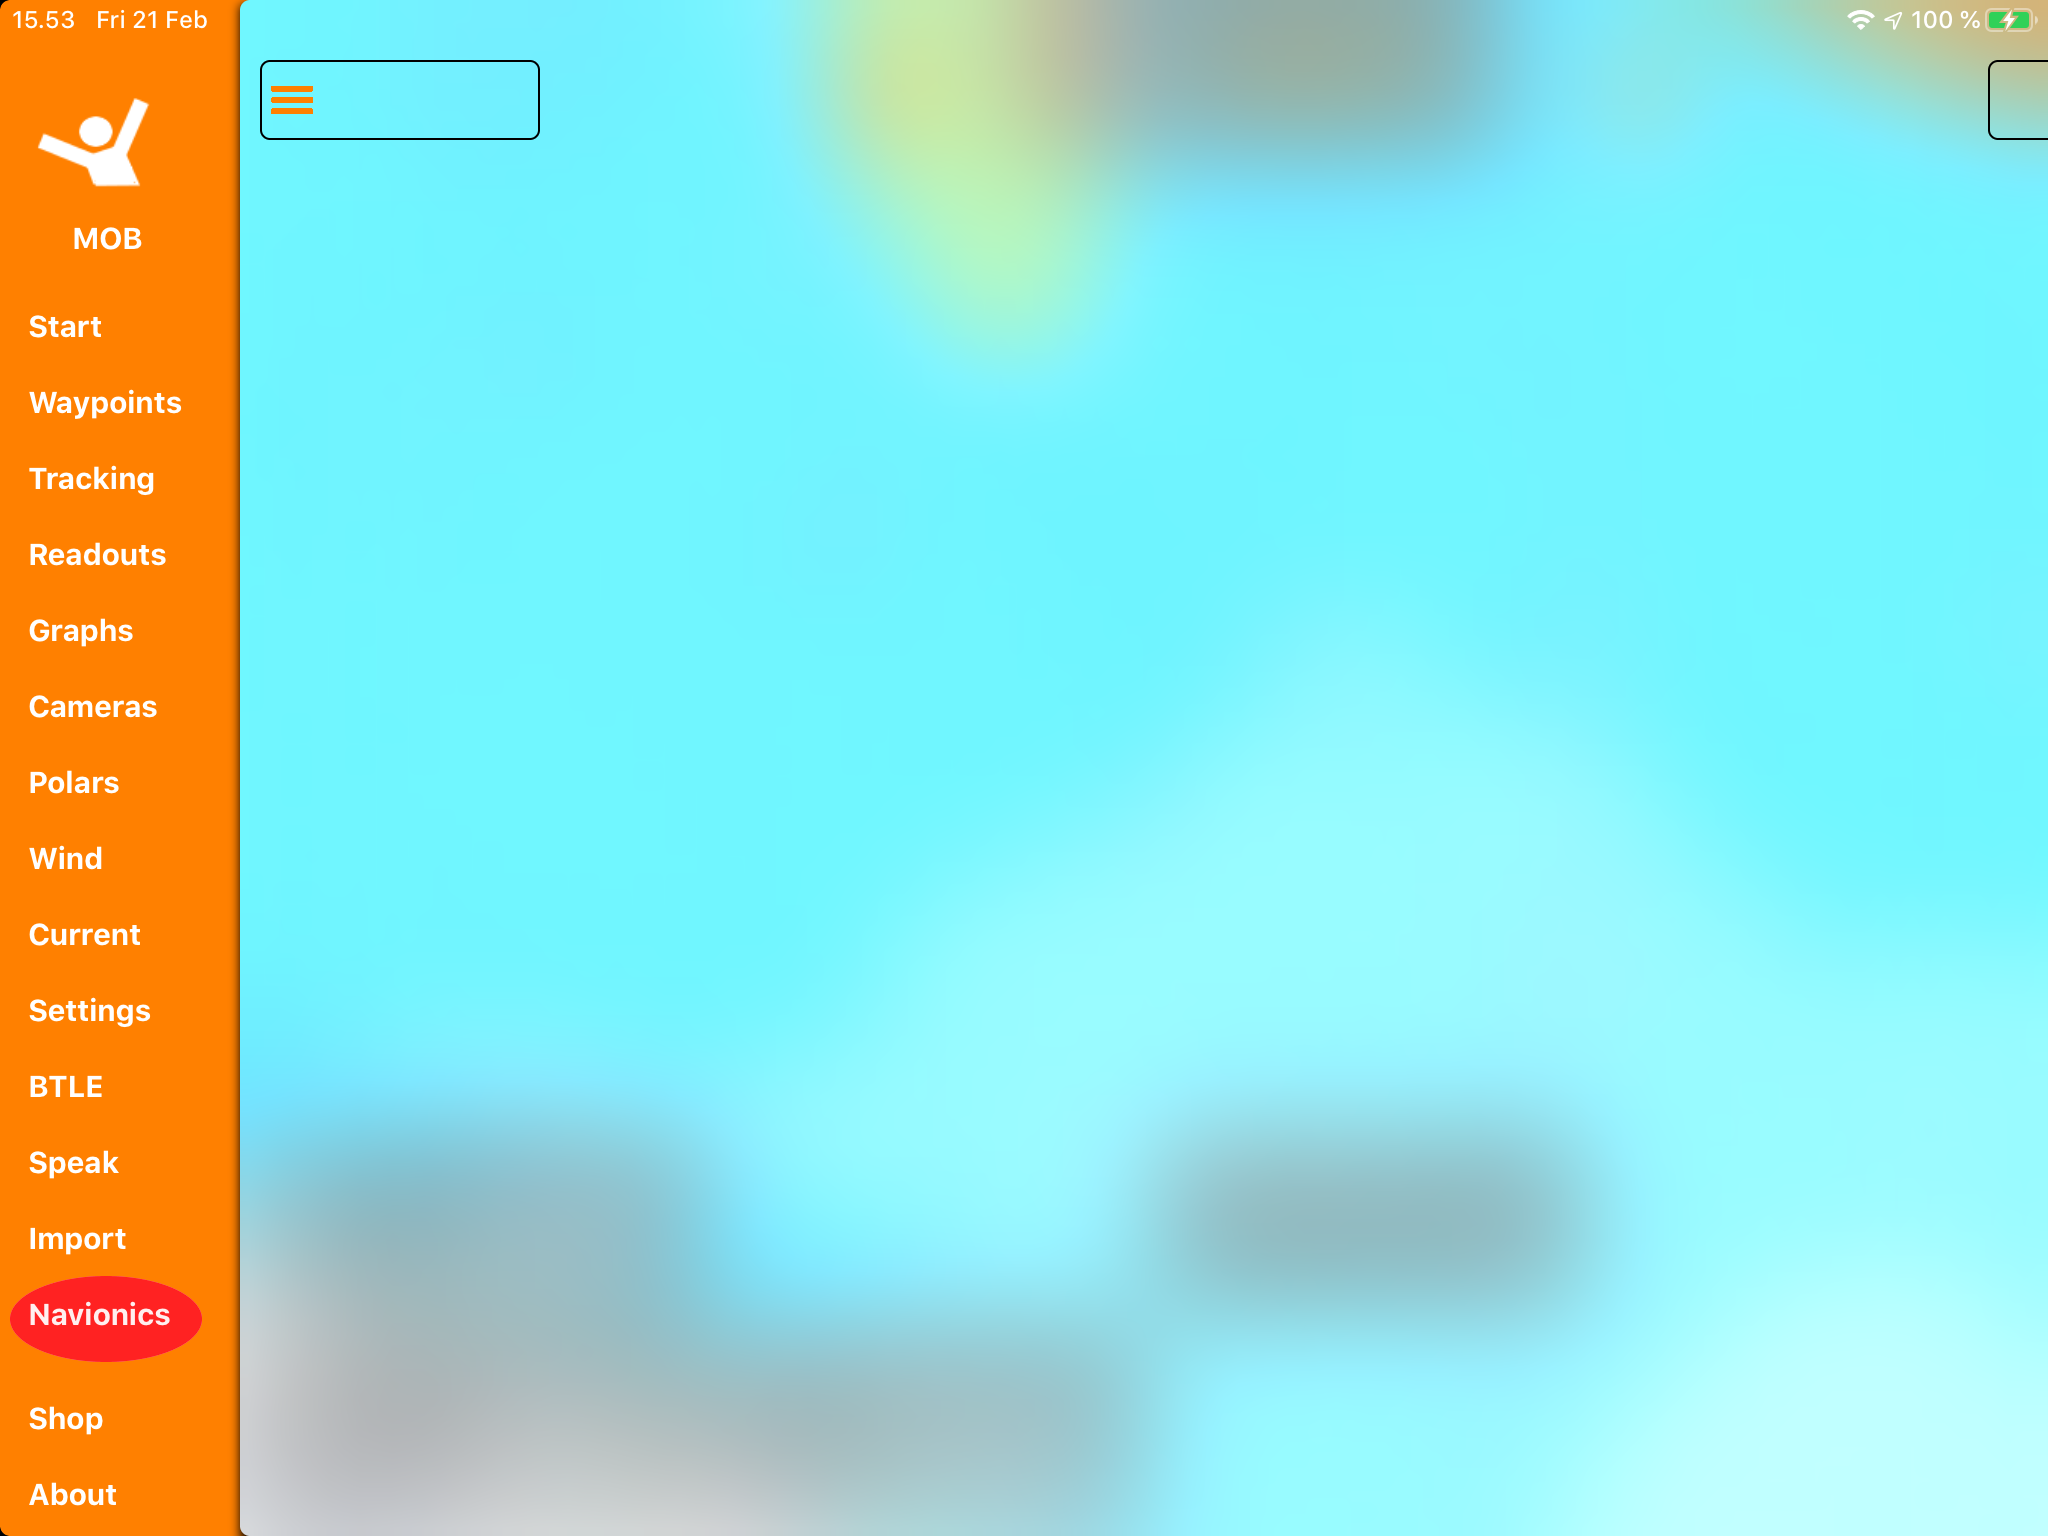
Set up Navionics
- You see a "Navionics" option in the left menu - tap it.
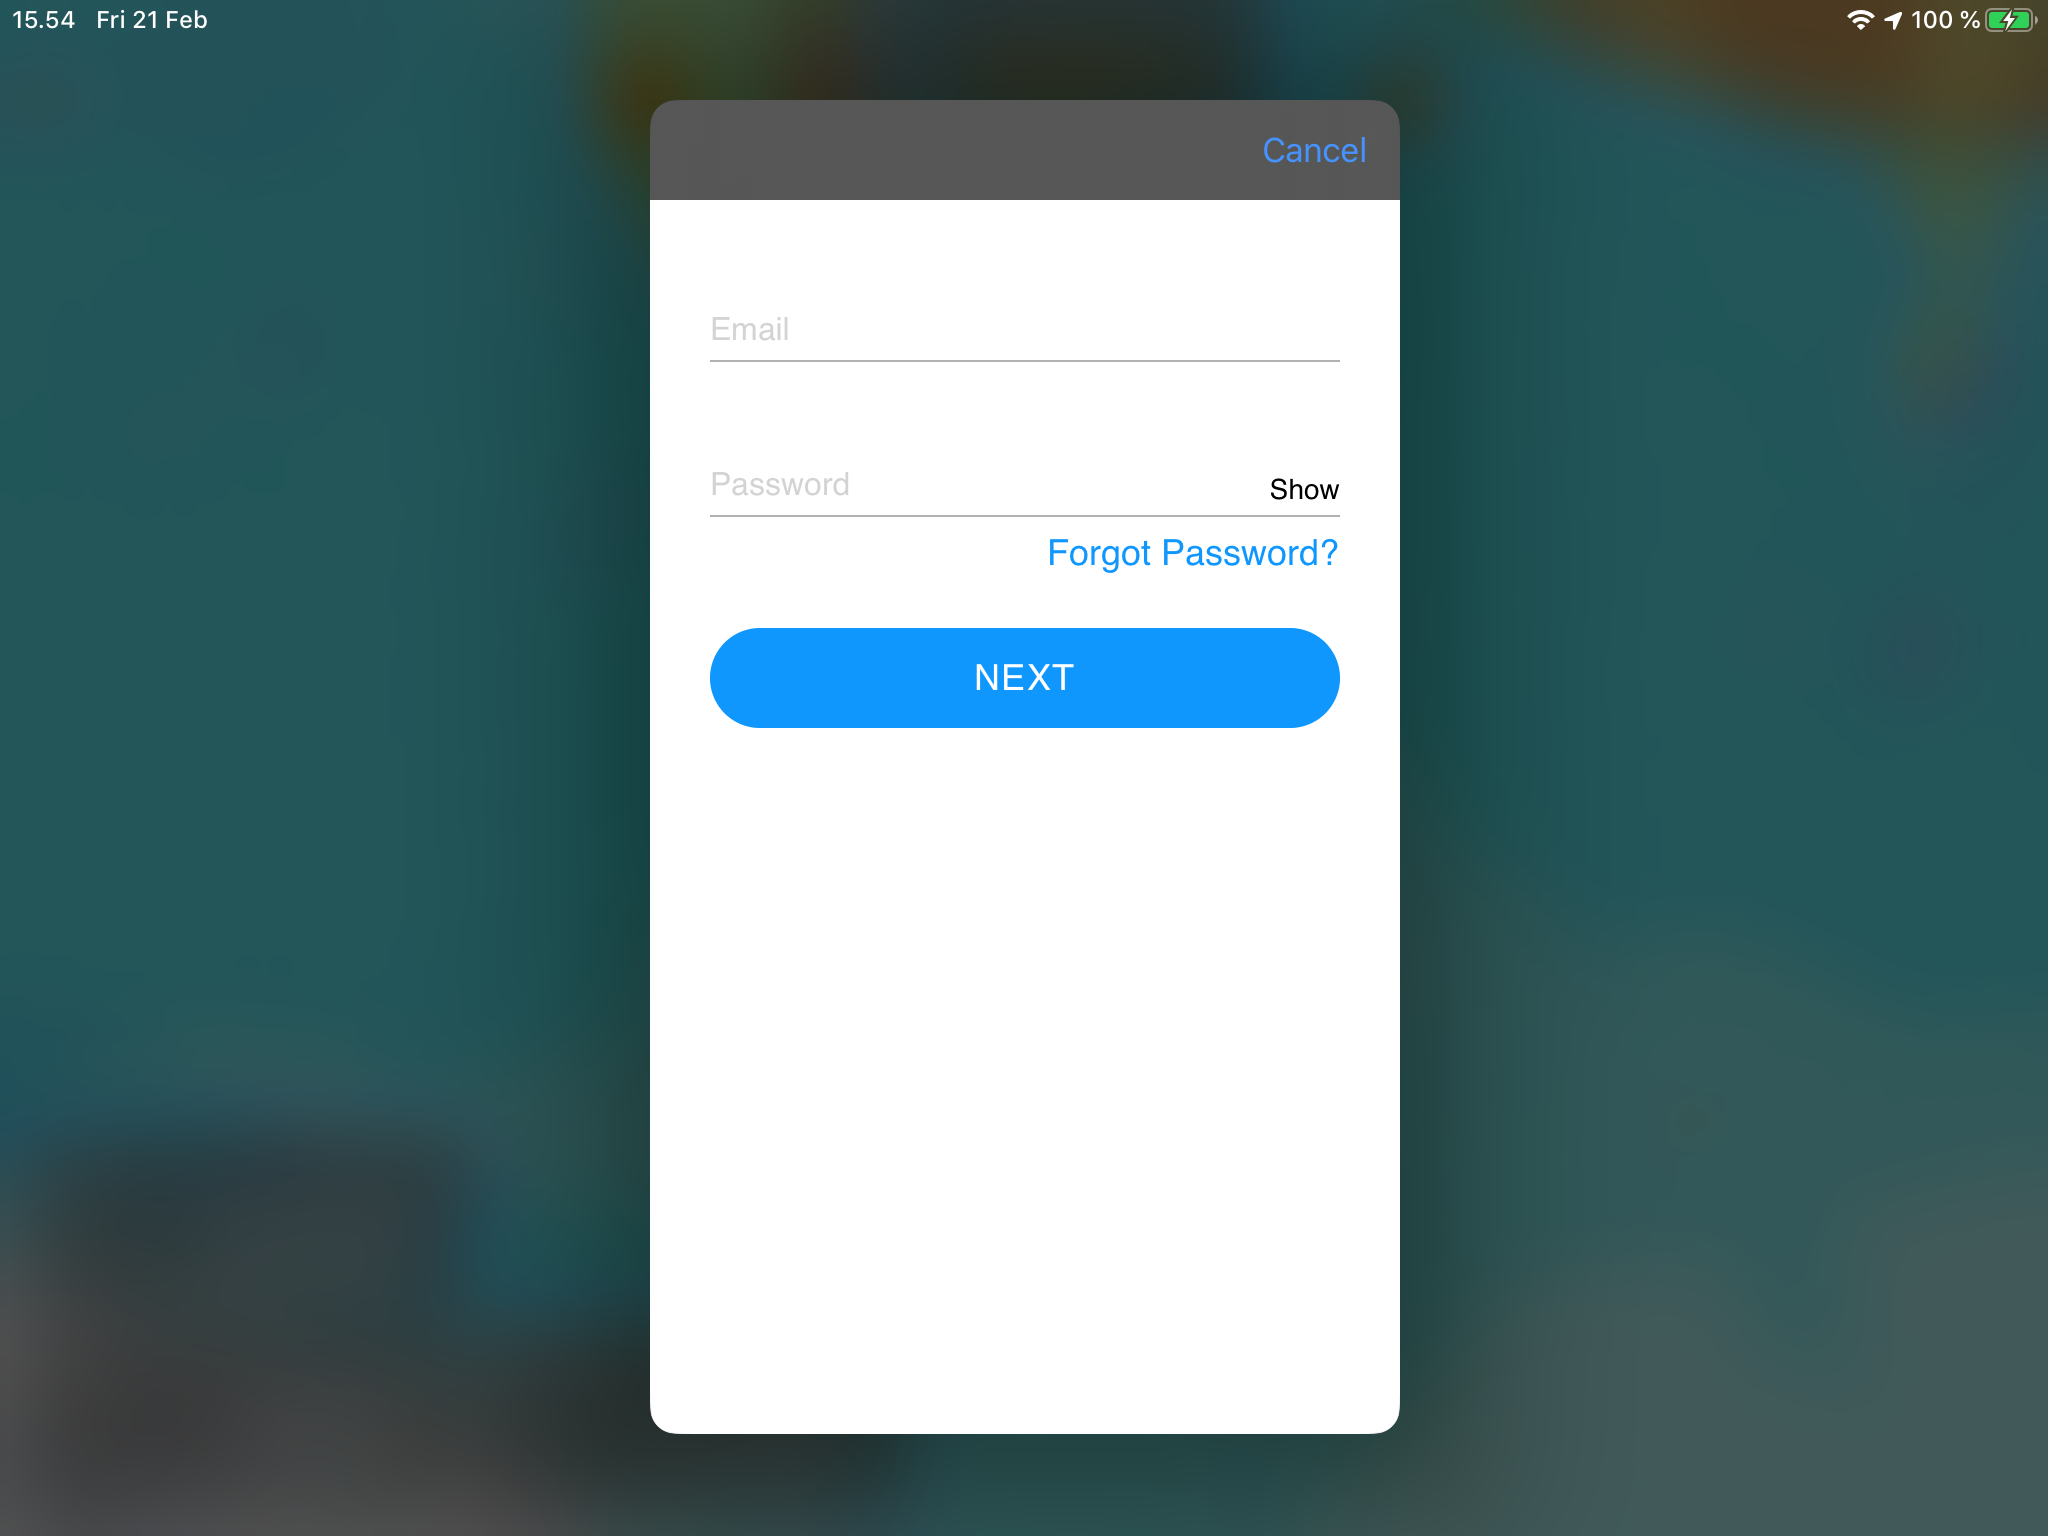
- Sign in with your Navionics account
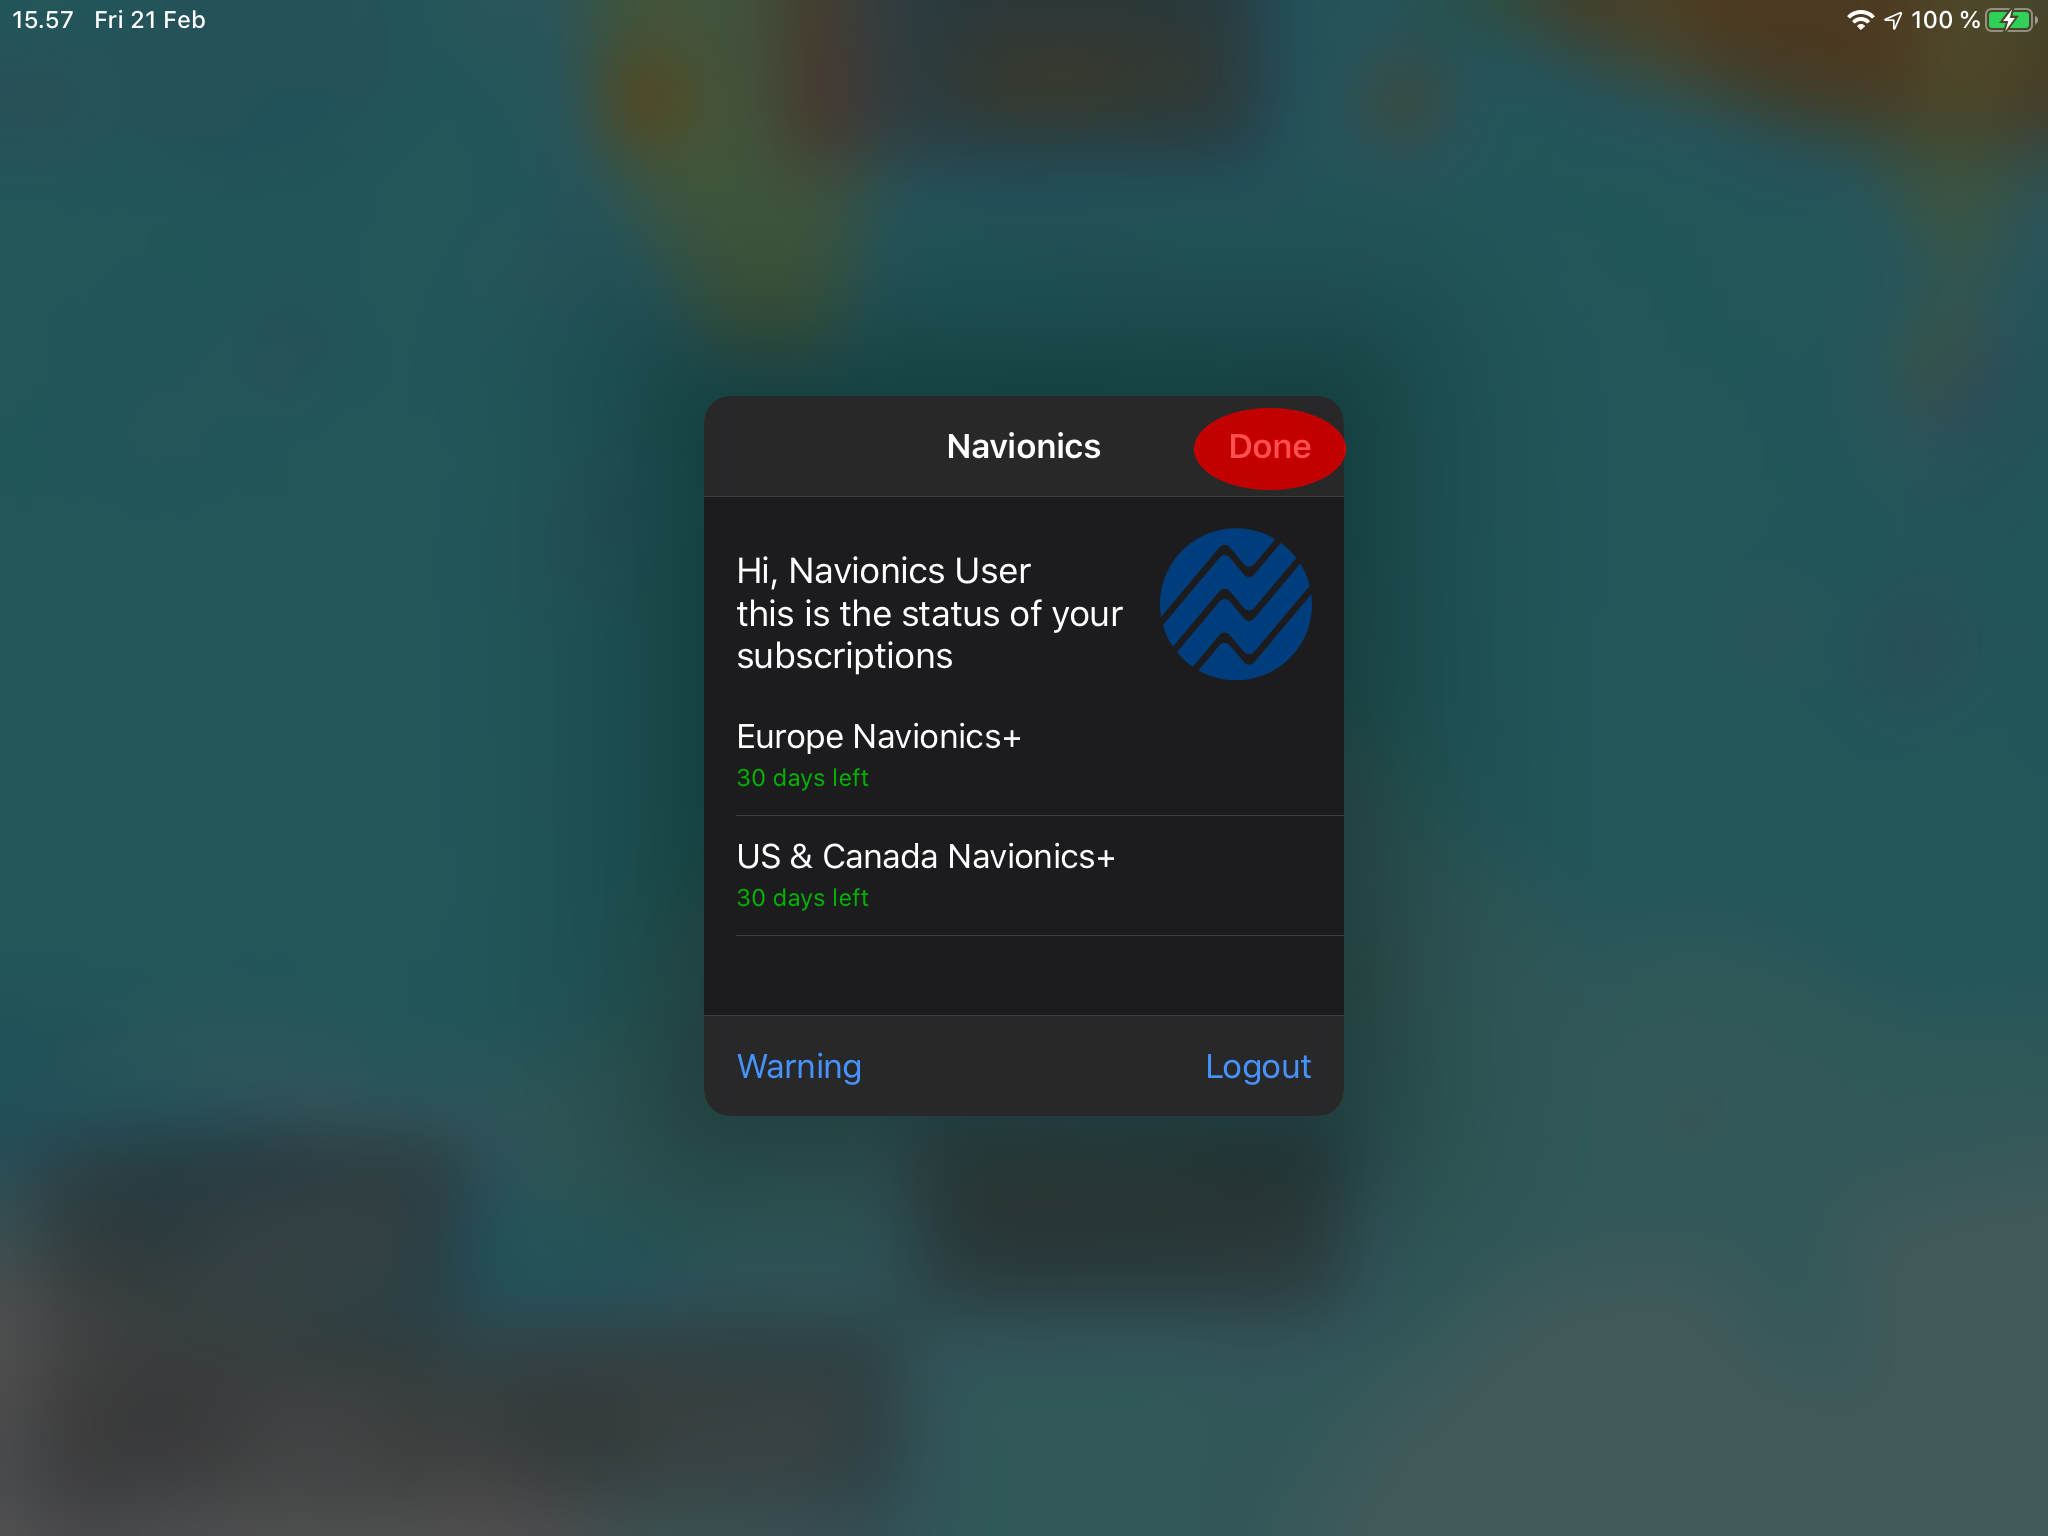
- Tap "Done".
- Enter the settings and select Navionics as Maps.
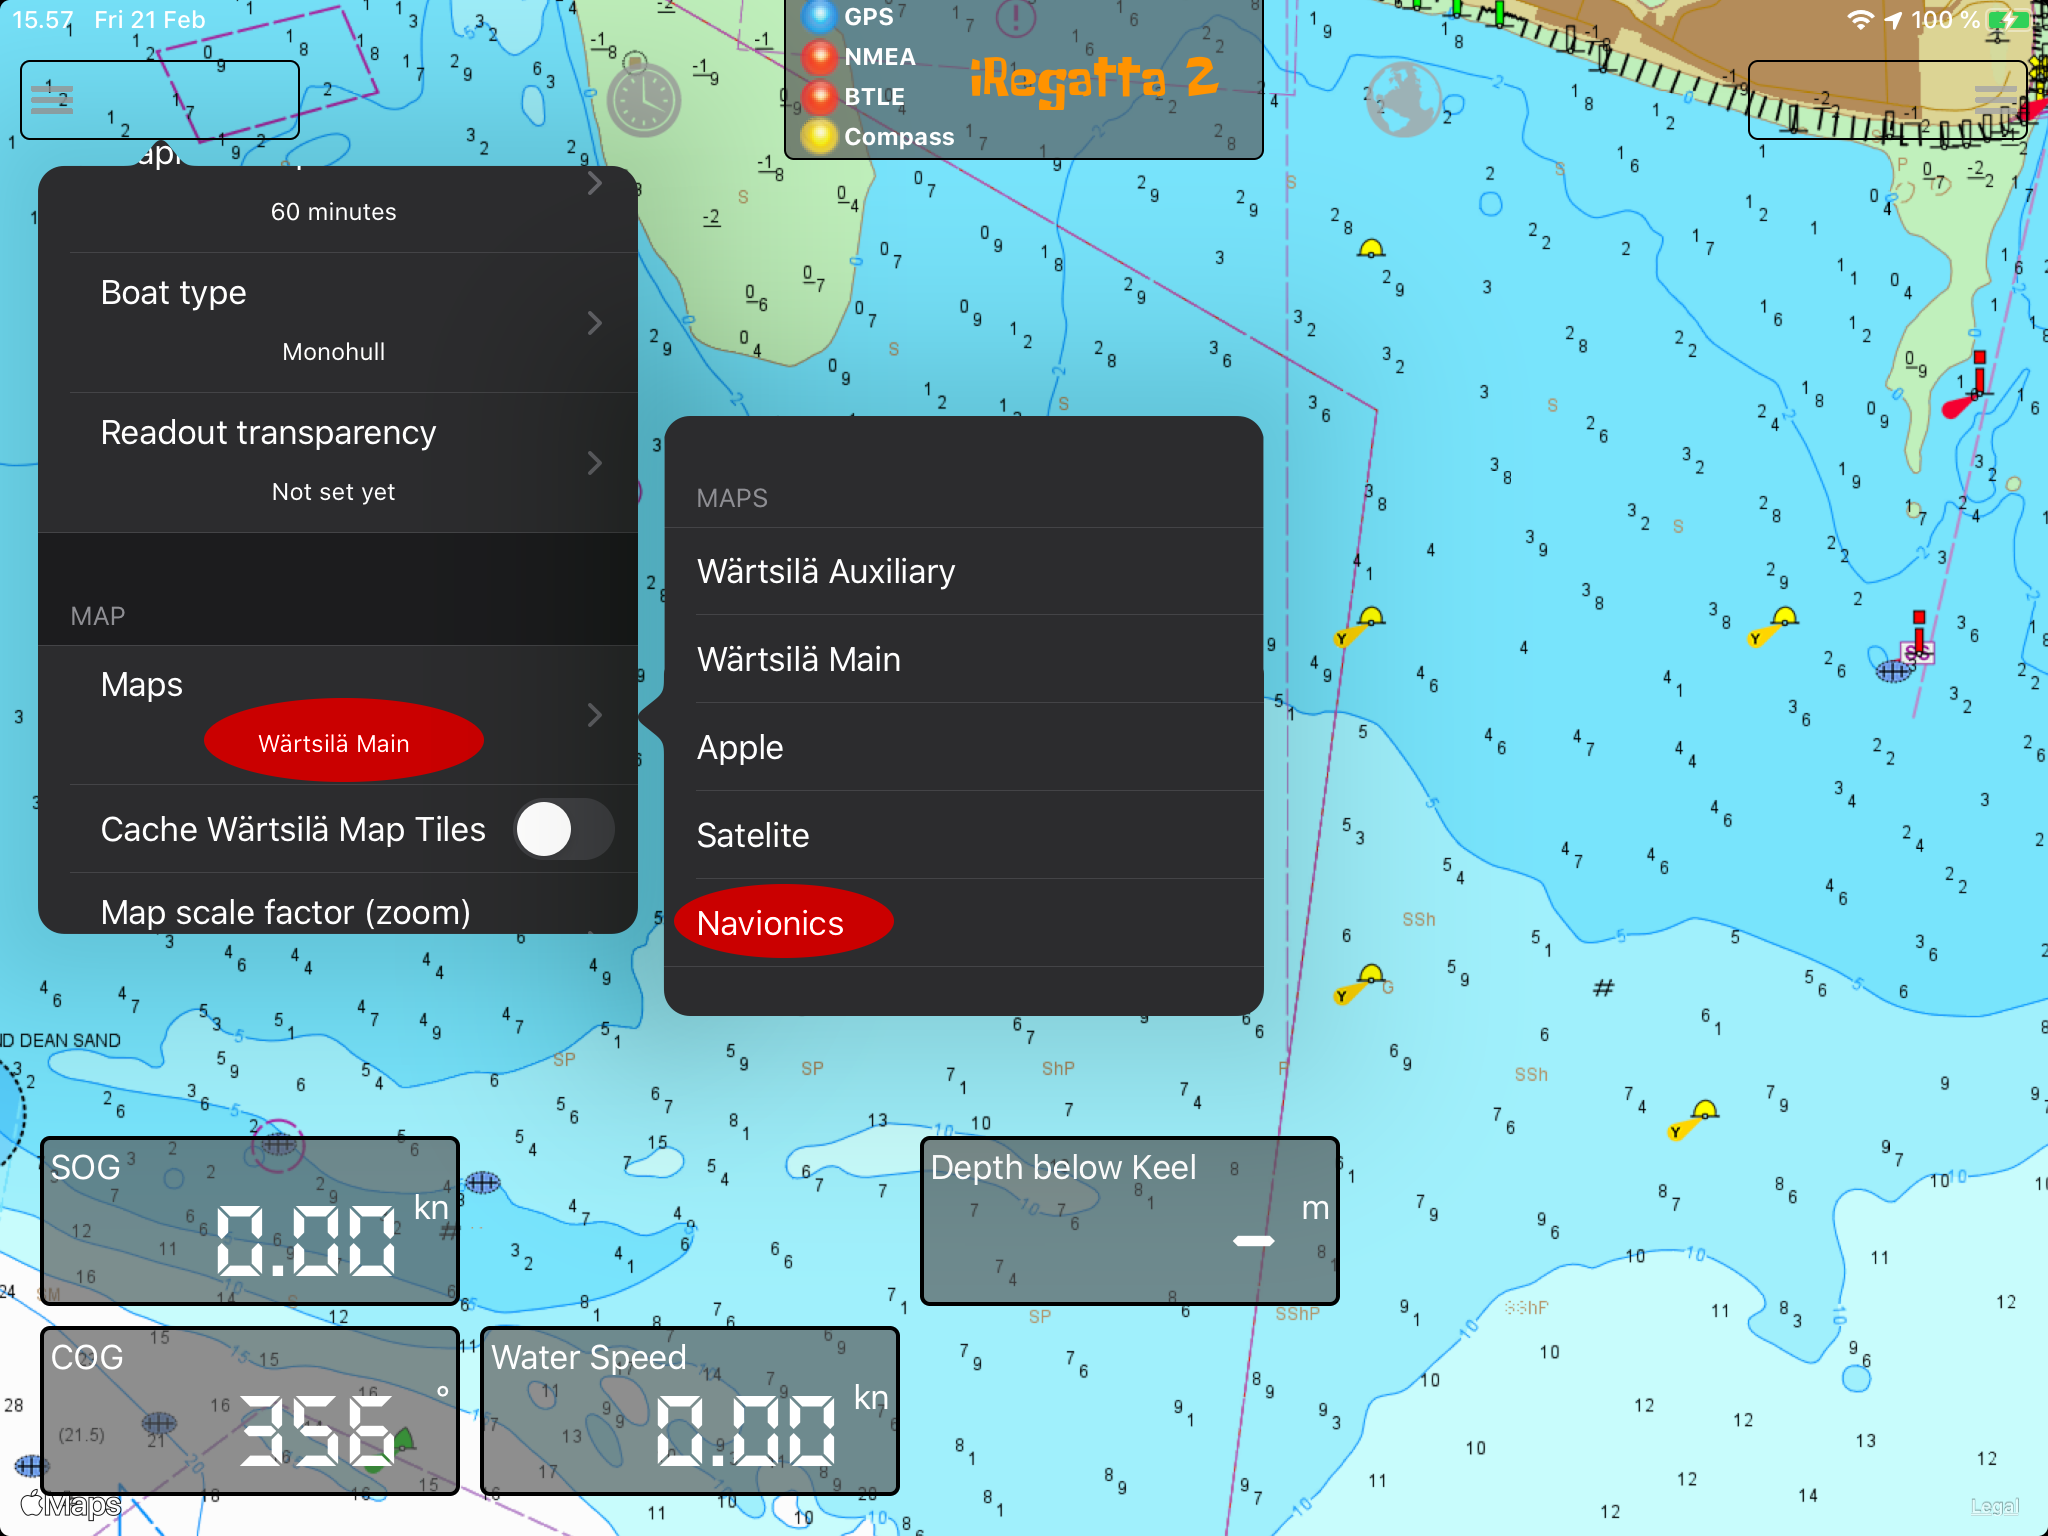
Now you should be able to use your Navionics maps in iRegatta2.
If you long tap on a map annotation, you now get the "Geo Info" option. If you have internet connection you can get additional data like photos and tidal data. Other Geo Info might be available as well off-line.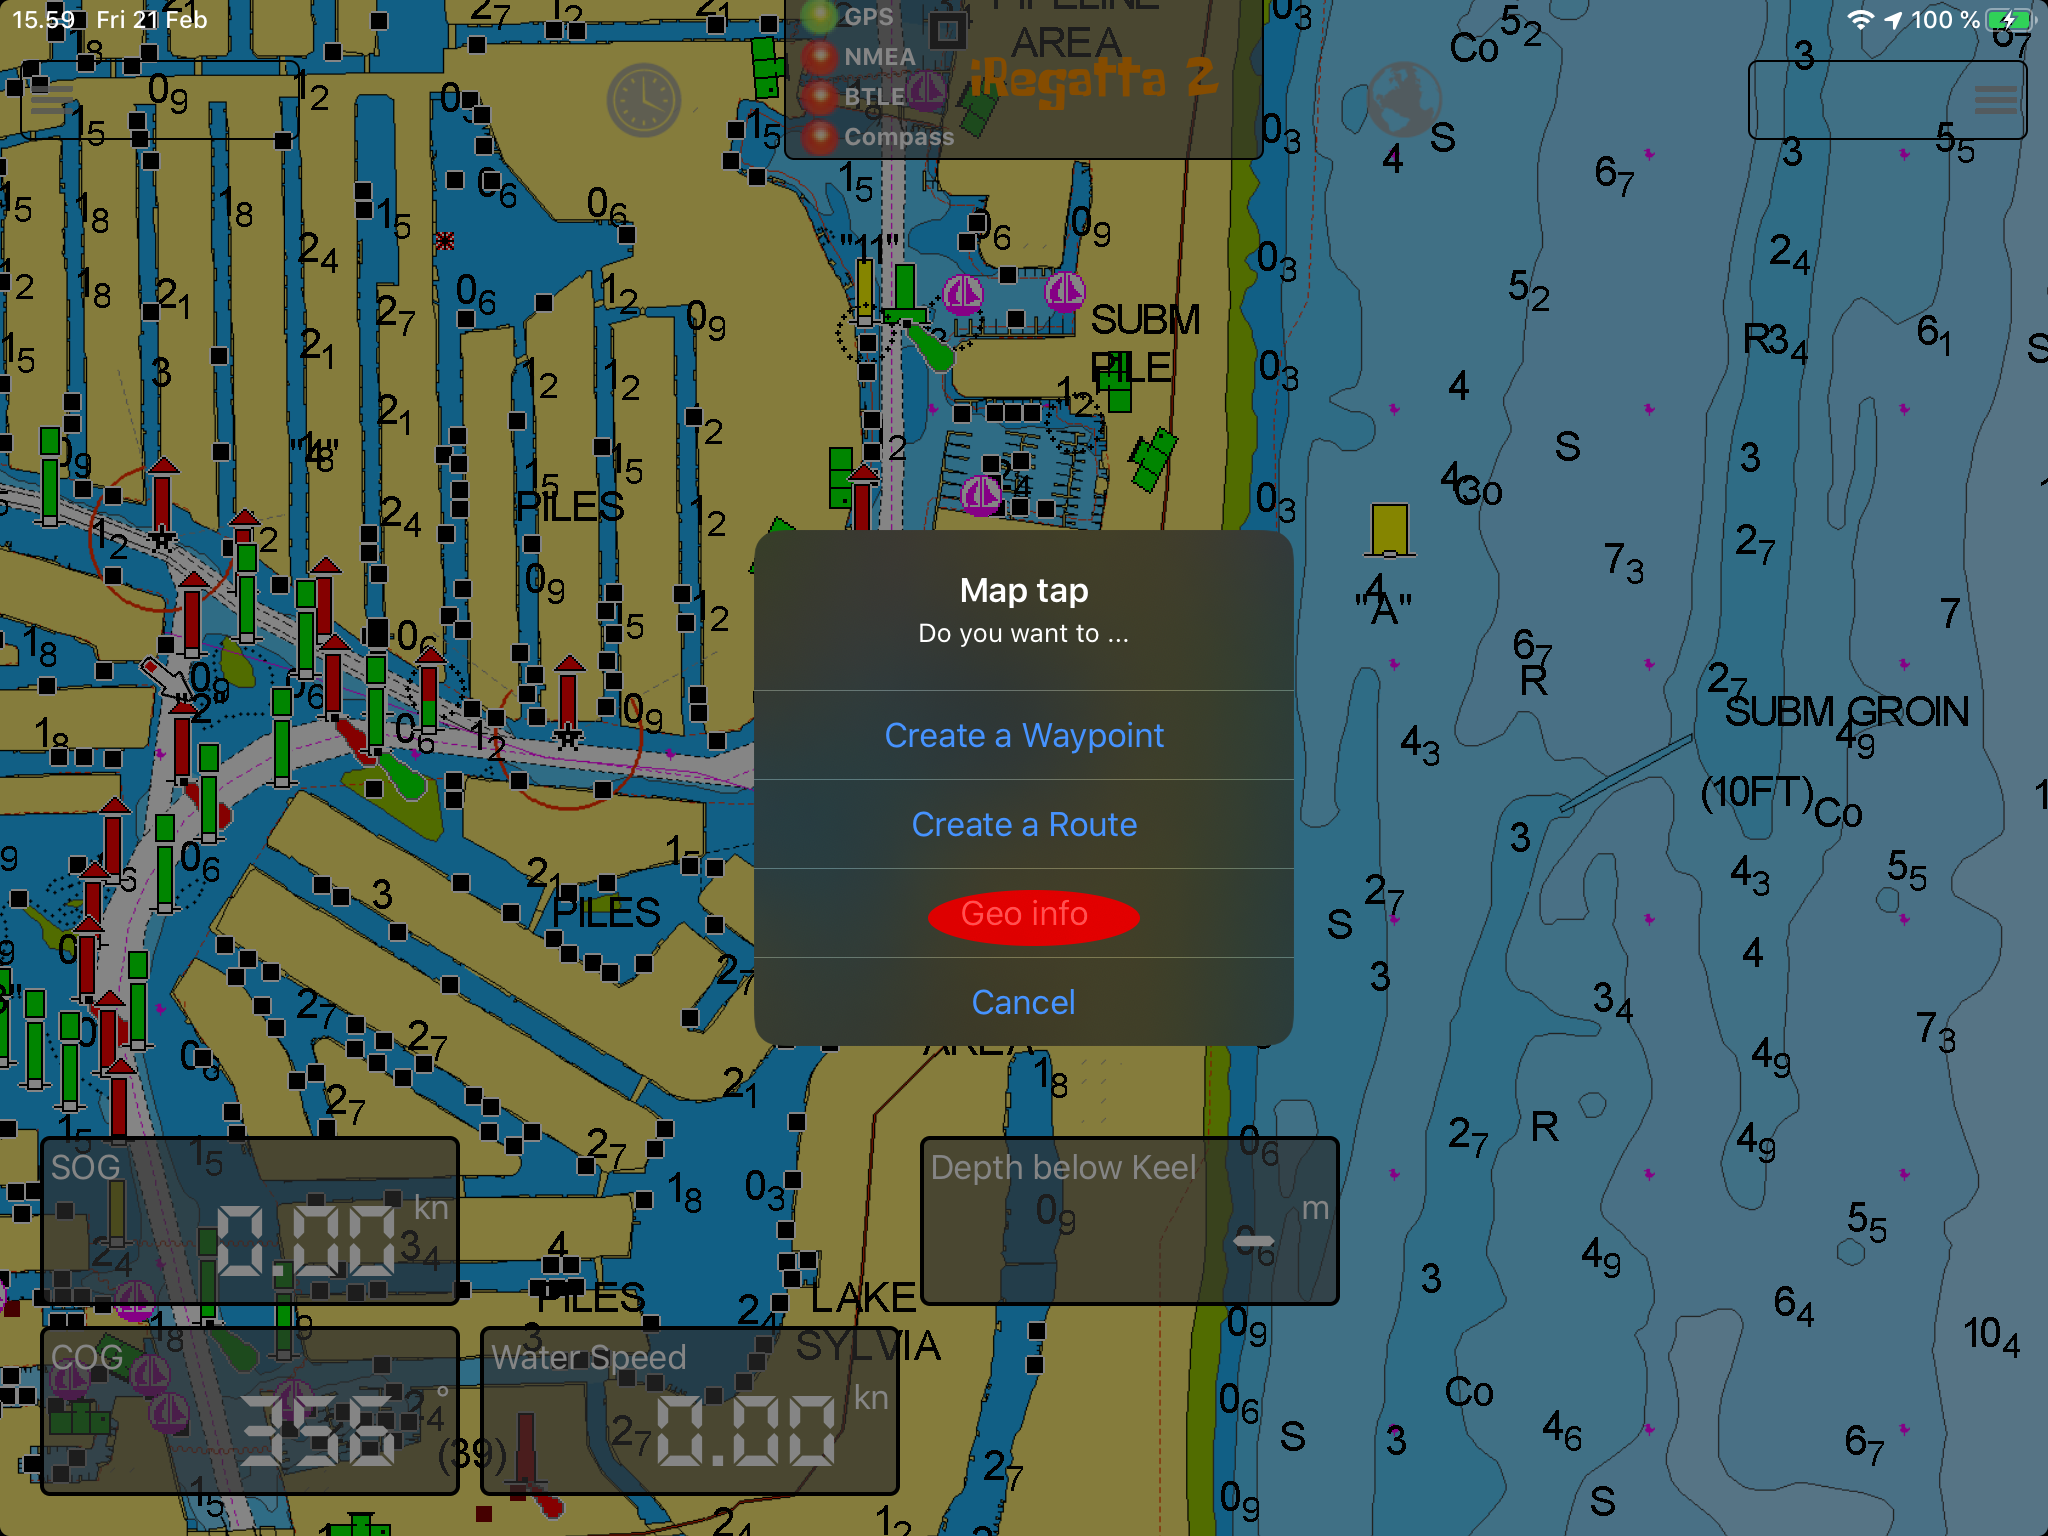

Navionics Download
To make sure you have the Navionics maps you need when offline, you can request download of an area to your iPad.
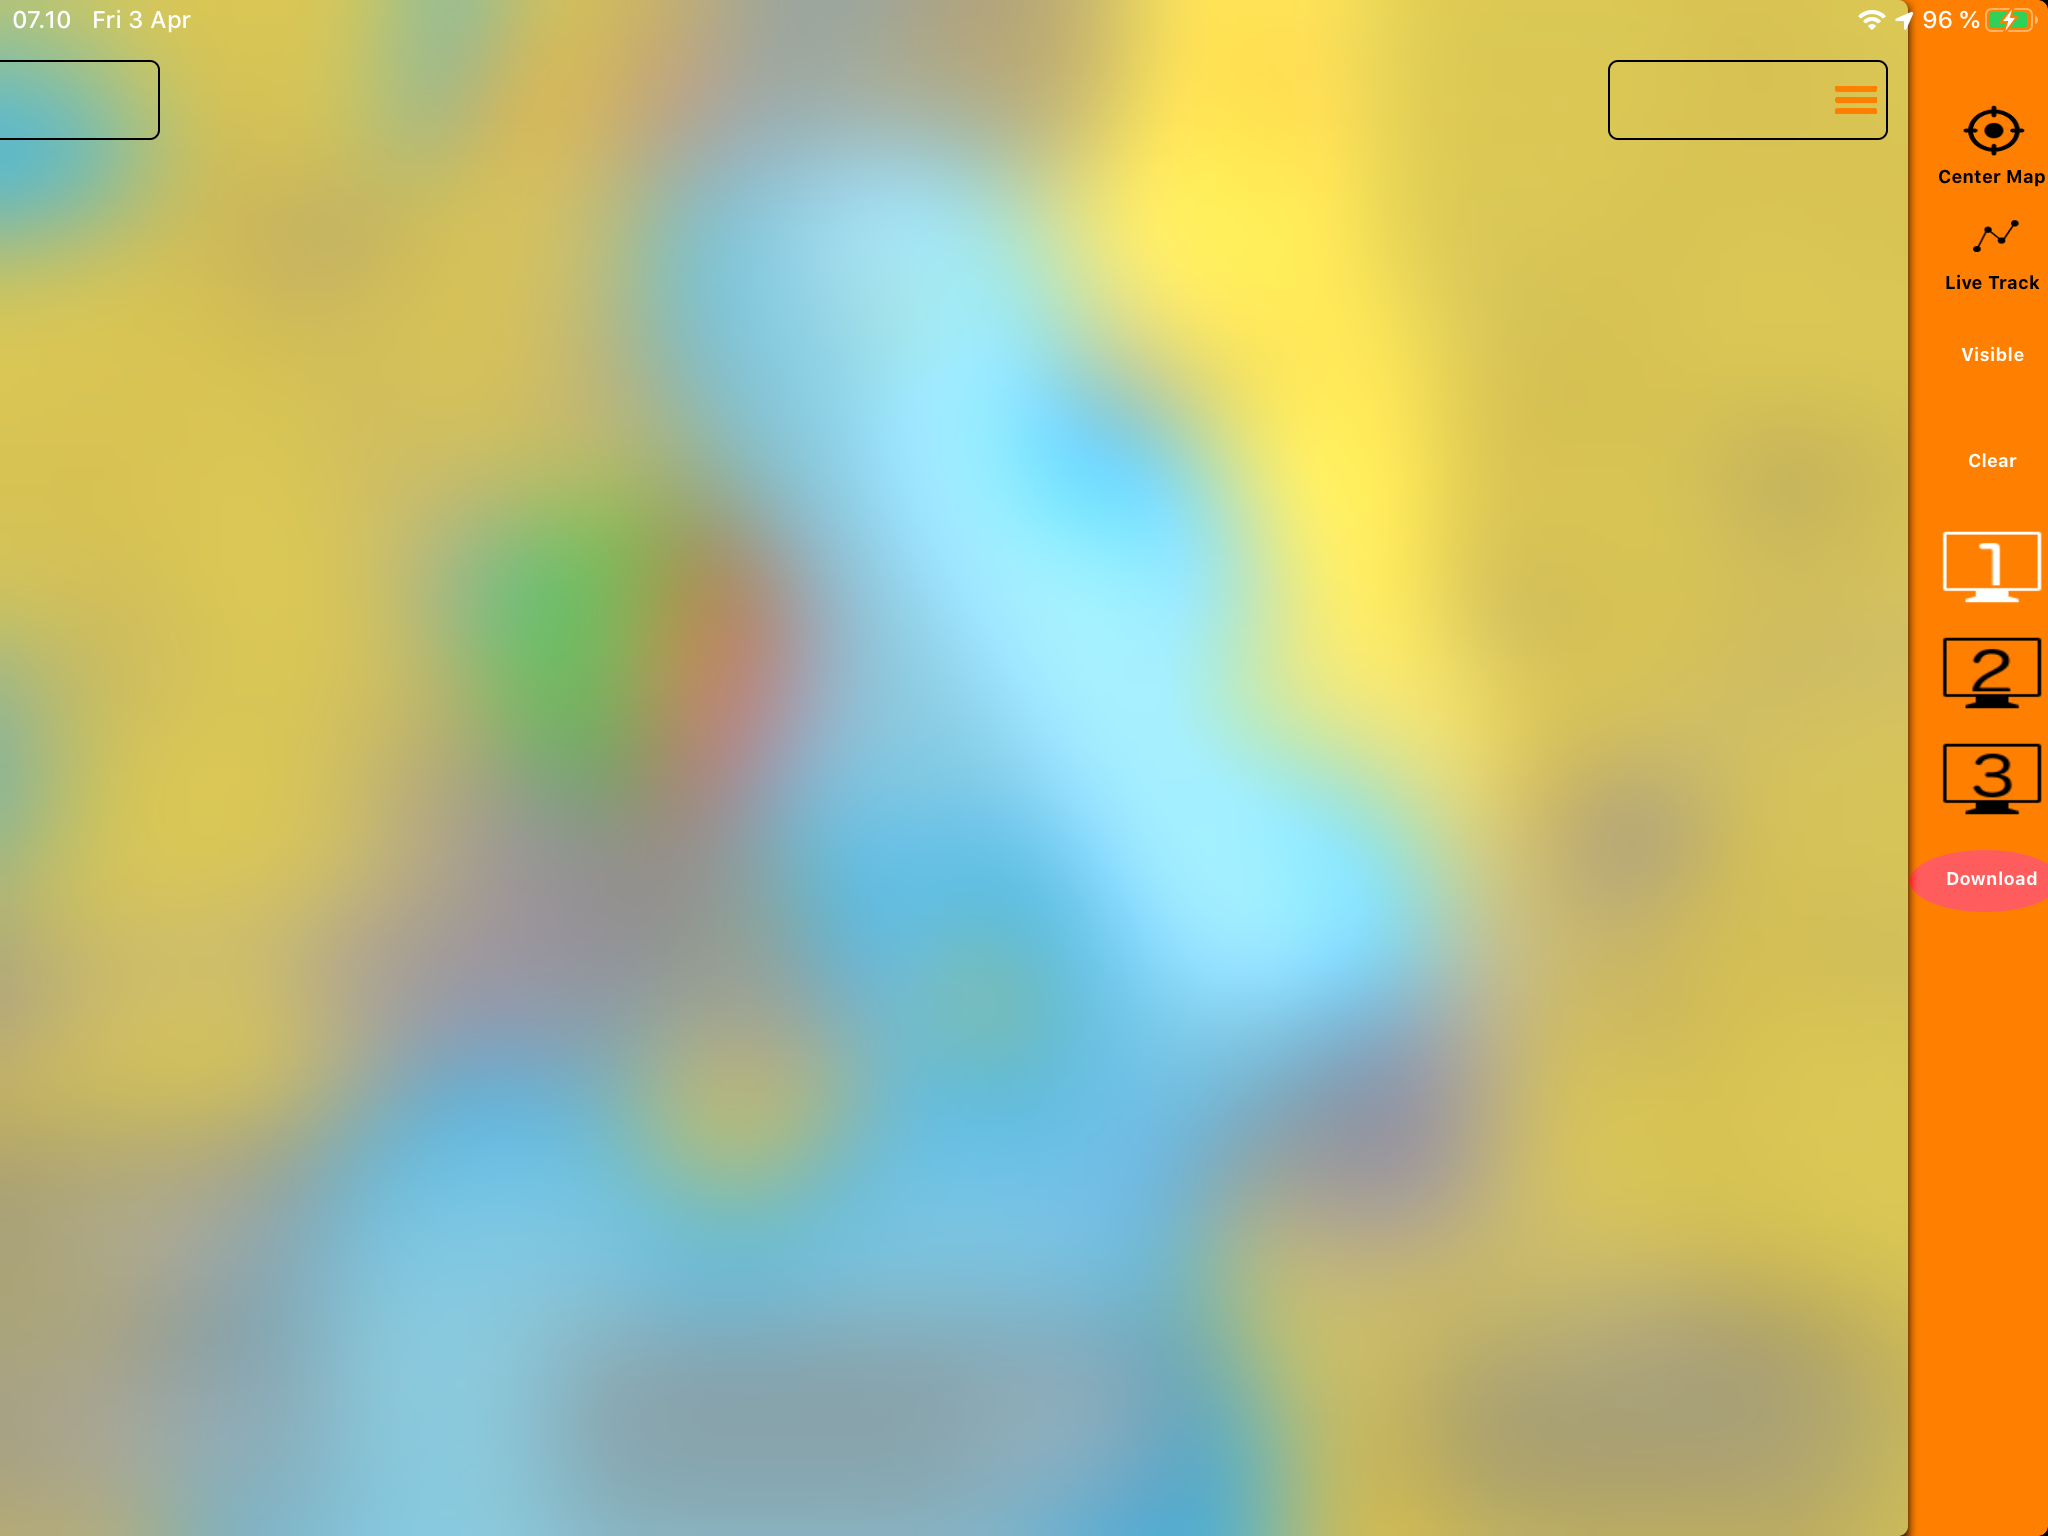
- While you are using Navionics maps, open the right menu and select "Download".
- Select the are you want to download by dragging the corners of the selection rectangle, and then tap the "Download" button at the upper left corner.
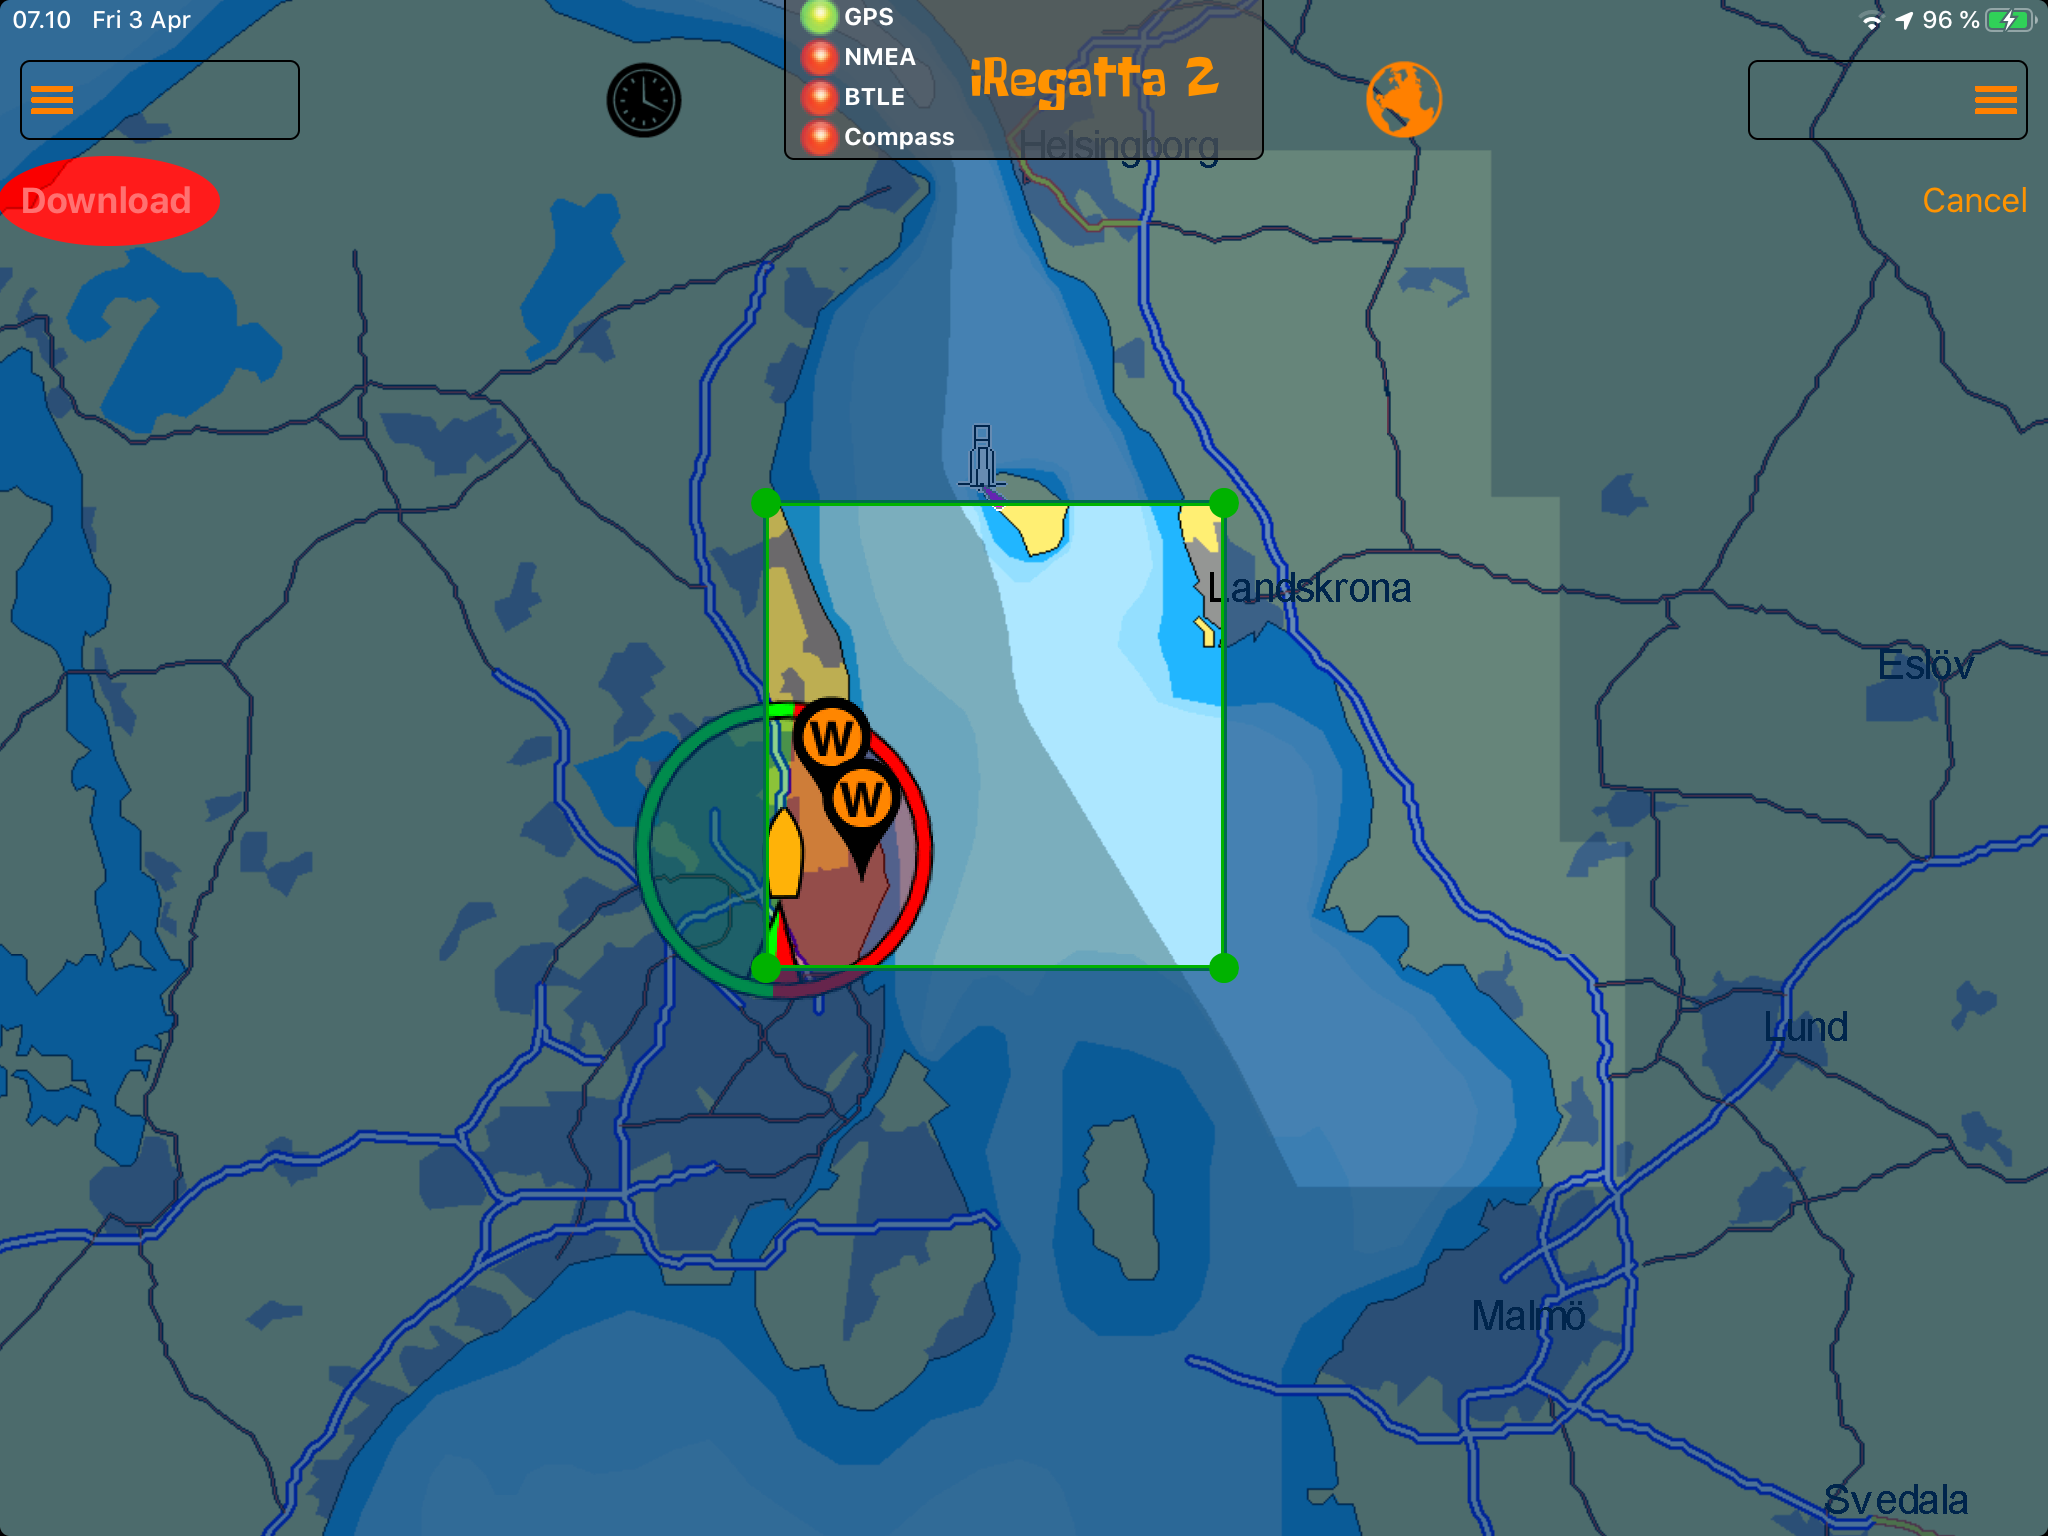
- Allow some time for the download to happen. Unfortunately no download progress information is available.
Main view features
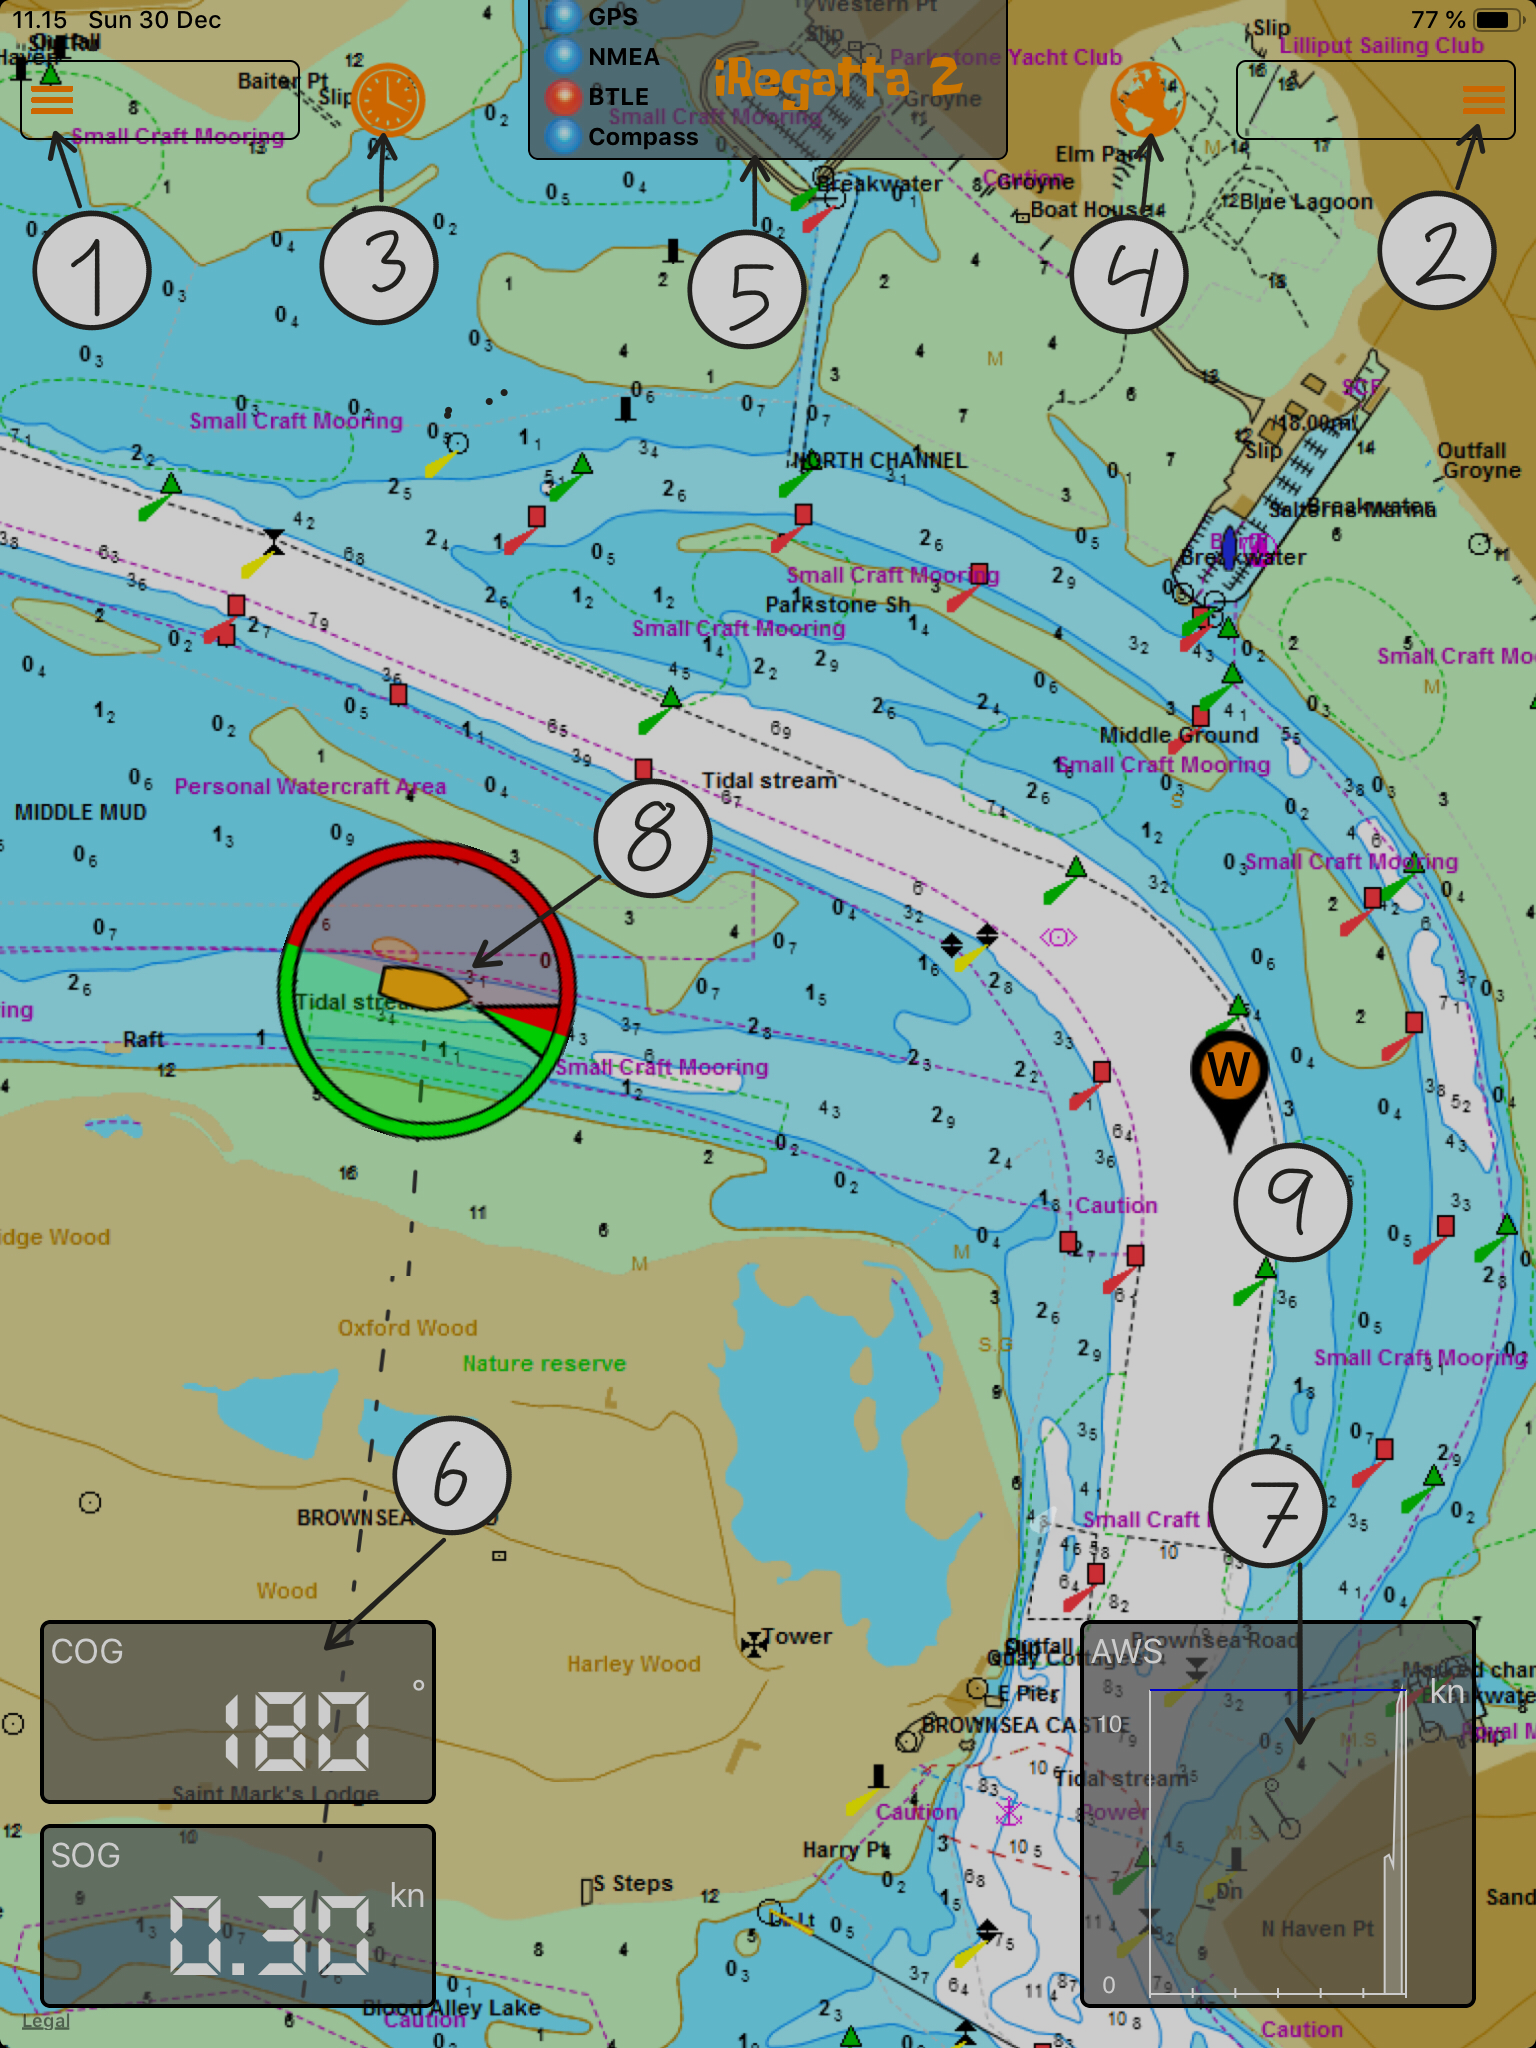
iRegatta 2 is a map centric app. This means that the map is the central view where all informations are visualized. Here are the main features in the map view:
- Feature menu
- Visualization menu
- Show/hide readouts and graphs
- Show/hide maps
- Connection status
- Readous
- Graphs
- Boat and wind sympols
- Waypoints
Feature menu
If you tap the feature menu, the map will blur and slide to the right and show a menu with different features. Tap the button again to hide the menu, or tap one of the features in the menu.
Visualization menu
If you tap the visualization menu, the map will blur and slide to the left and show a menu with different visualization options. Tap the button again to hide the menu, or tap one of the features in the menu.
Show/hide readouts and graphs
If you tap this button, all readouts and graphs will be hidden or shown. Use this if you want to get a clear view of the map.
Show/hide maps
If you just want to use iRegatta 2 to show instrument data and graphs only, you can tap this button to hide the maps.
Connection status
Here you see an overview of your connection status to GPS, Compass, NMEA data over WiFi and Bluetooth devices.
If you tap on the view, it will expand and you’ll get additional information. If NMEA data is received, you’ll see the NMEA sentences coming in.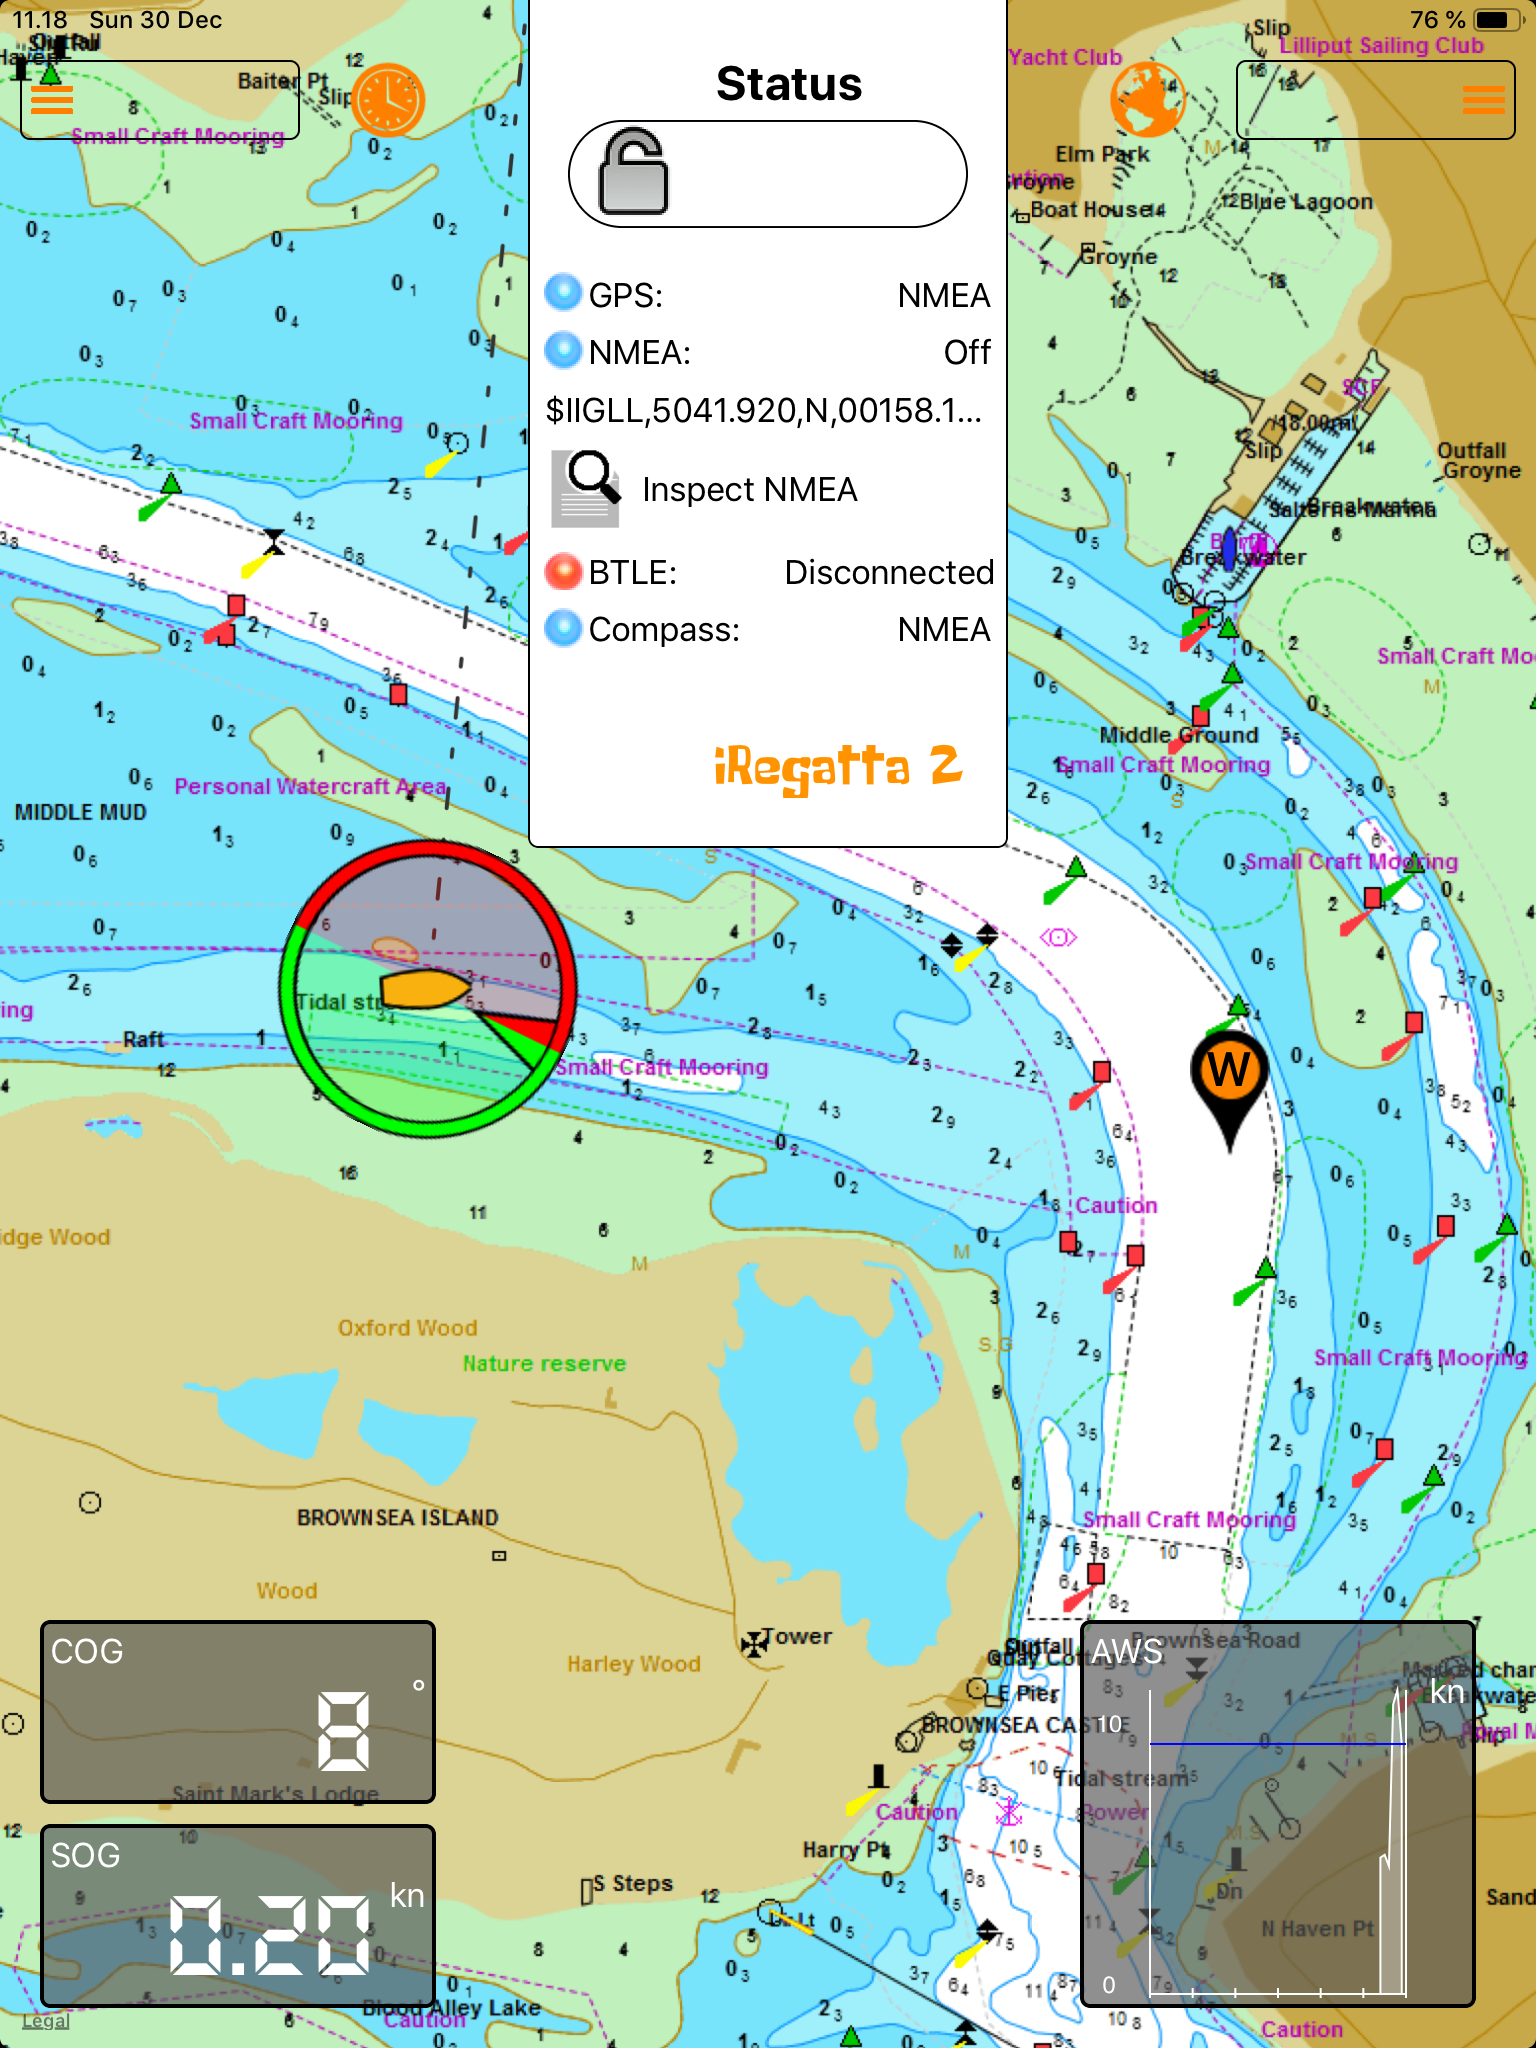
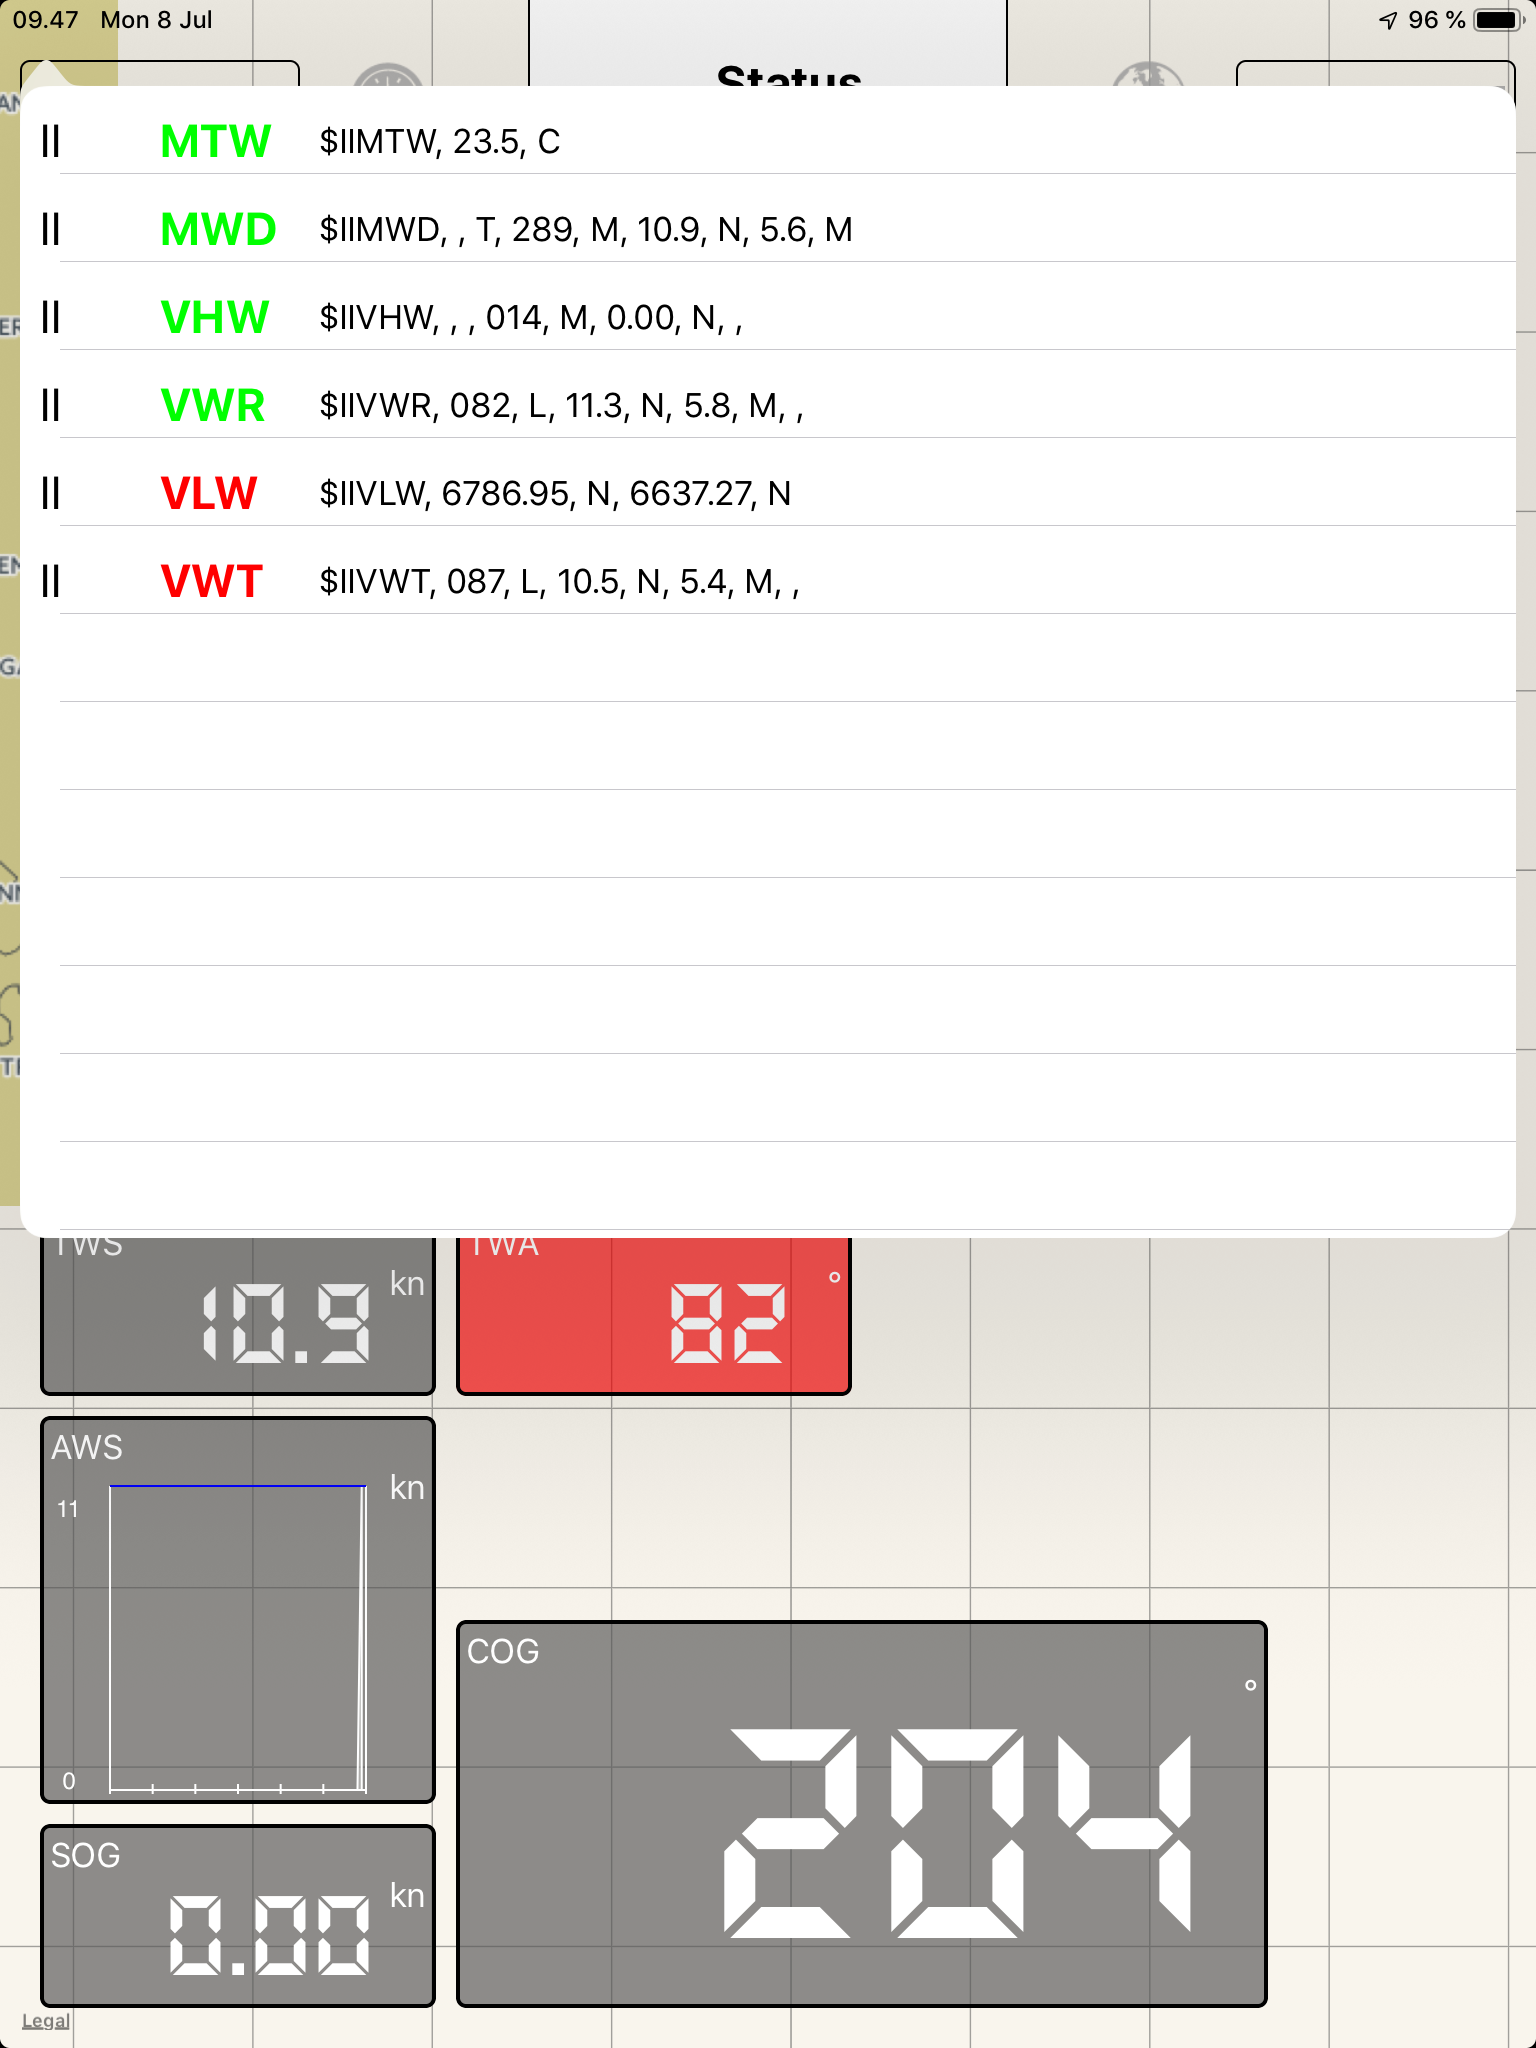
A tap on the icon in front of “Inspect NMEA” will show a list of all NMEA sentence types. Sentences in green represent sentences that are handled by iRegatta 2. Sentences in red are ignored by iRegatta 2.
Readouts
You can add, rearrange, resize and remove all data in readouts. This way you are in full control over what information you want to see on your screen. More detailed information on this later.
Graphs
You can allso add history graphs on all data in the same way as you do with readouts.
Boat and wind symbols
A pictogram of your boat represents your current position and heading. If compass data is available, this will be used as heading. If not, course over ground from the GPS will be used instead.
A red and green circle with an arrow represents the wind direction.
Waypoints
Waypoints are represented by a marker. To make it easier to distinguish between all the waypoints, the first letter of the waypoint name is shown in the marker.
Visualization options
In the visualization menu to the right, you have a couple of options to change what’s visible in the map.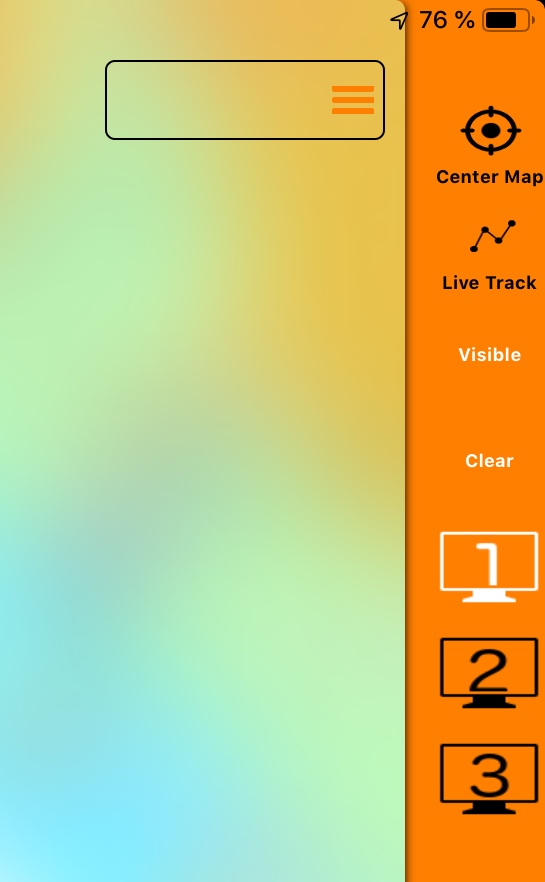
Center map
If this is turned on, iRegatta 2 will always keep your current position in the center of the screen.
If you pan in the map (drag with just one finger), the center map feature will automatically turn off.
Zooming (pinch with two fingers) will not turn of Center map.
Live track
If you turn on Live track, your track will be shown on the map. A new point is added every 10 seconds. The Reset button will erase the current track from the map.
Live track is only a track on the map, the track is not recorded for later export or analysis. For that kind of tracking use the tracking feature in the left feature menu (more about that later).
Visible
Under this option you get a sub menu where you can turn on and off all the different graphics on the map.
Waypoints, you can choose if you want to see all, only waypoints in the current route or none.
Bearing line to the next waypoint.
Laylines from the next waypoint, based on wind data and your polar file.
Start polar, overlays the polar on the map while in the start view (more about this later).
Wind, turns on and off the wind rose at the current position.
COG, shows a line of the current course over ground.
AIS, shows AIS vessels in the map, if you have an AIS Receiver attached to the NMEA network.
Clear
This button will clear the cache of stored Wärtsilä maps.
Screen 1, 2 and 3.
You can have 3 different screen arrangements with your readouts. So for instance you can have one screen with readouts for cruising, another with racing data and a third with history graphs for analysis and tactics.
Readouts and Graphs
In iRegatta 2 you decide which readouts and graphs you want to display.
To get started, open the feature menu (the left menu) and select readout or graph.
A list of available readouts will appear, and you can tap on the ones you want to display, to add them to the screen. When you are done, simply tap outside the list to end the adding process.
The readouts are all located in the lower right corner of the display. You an now rearrange and resize them to your likings.
Long tap on an readout, and it will turn red and a grid will appear. Now you are in edit mode. You can drag the readout to any free place in the grid, and it will snap to the grid. The edit mode automatically ends. You can also pinch the readout while in edit mode, to adjust its size. If you double tap on a readout while in edit mode, it will be removed from the current screen.
The readout positions are stored individually for landscape and portrait mode.
In the visualization menu (the right menu), you can choose between 3 different screens, where you can configure different readout layouts.
Waypoints and Routes
A important part of navigation is the use of waypoints and routes. In iRegatta 2, creating, modifying and using waypoints is managed directly from the map.
To create a waypoint, simply long tap on the map where you want to create the waypoint and a popup menu will show. In that menu you choose “Create a Waypoint”.
A popup shows where you can modify name and description of the waypoint and/or modify the position. Once you have made your changes, tap Save to store the waypoint. If you tap Delete, the waypoint will be removed again.
If waypoints are turned on in the visualization menu, waypoints will be displayed on the map, and the leading character of the waypoint name will be displayed in the marker, to make it easier to distinguish between waypoints on the map.
To modify or delete a waypoint, simply tap on the marker on the map and tap on the “i” button in the lable that pops up. This will bring you back to the popup view where you can update or delete the waypoint information.
After selecting a waypoint, you can also drag it to a new position, if you want to adjust its position.
You can also tap on the waypoint and tap the “Target” button. This will start navigation towards that waypoint.
When you have created a number of waypoints, you can create a route between them. Like with waypoint creation, this is done by long tapping in an empty area of the map and select “create a Route” in the popup menu.
After naming the route and tapping on the Save button, an empty list will appear in the map view. Tap on the waypoints in the map to add them to the route. Alternatively you can tap on the “Use list” button in the lower right corner of the screen, to get a list of waypoints to pick from instead of picking them from the map.
Once you are done adding waypoints to your route, tap the “End” button in the lower left corner of the screen. This will end the route creation.
iRegatta 2 automatically switches to route navigation once you stoped creating your route.
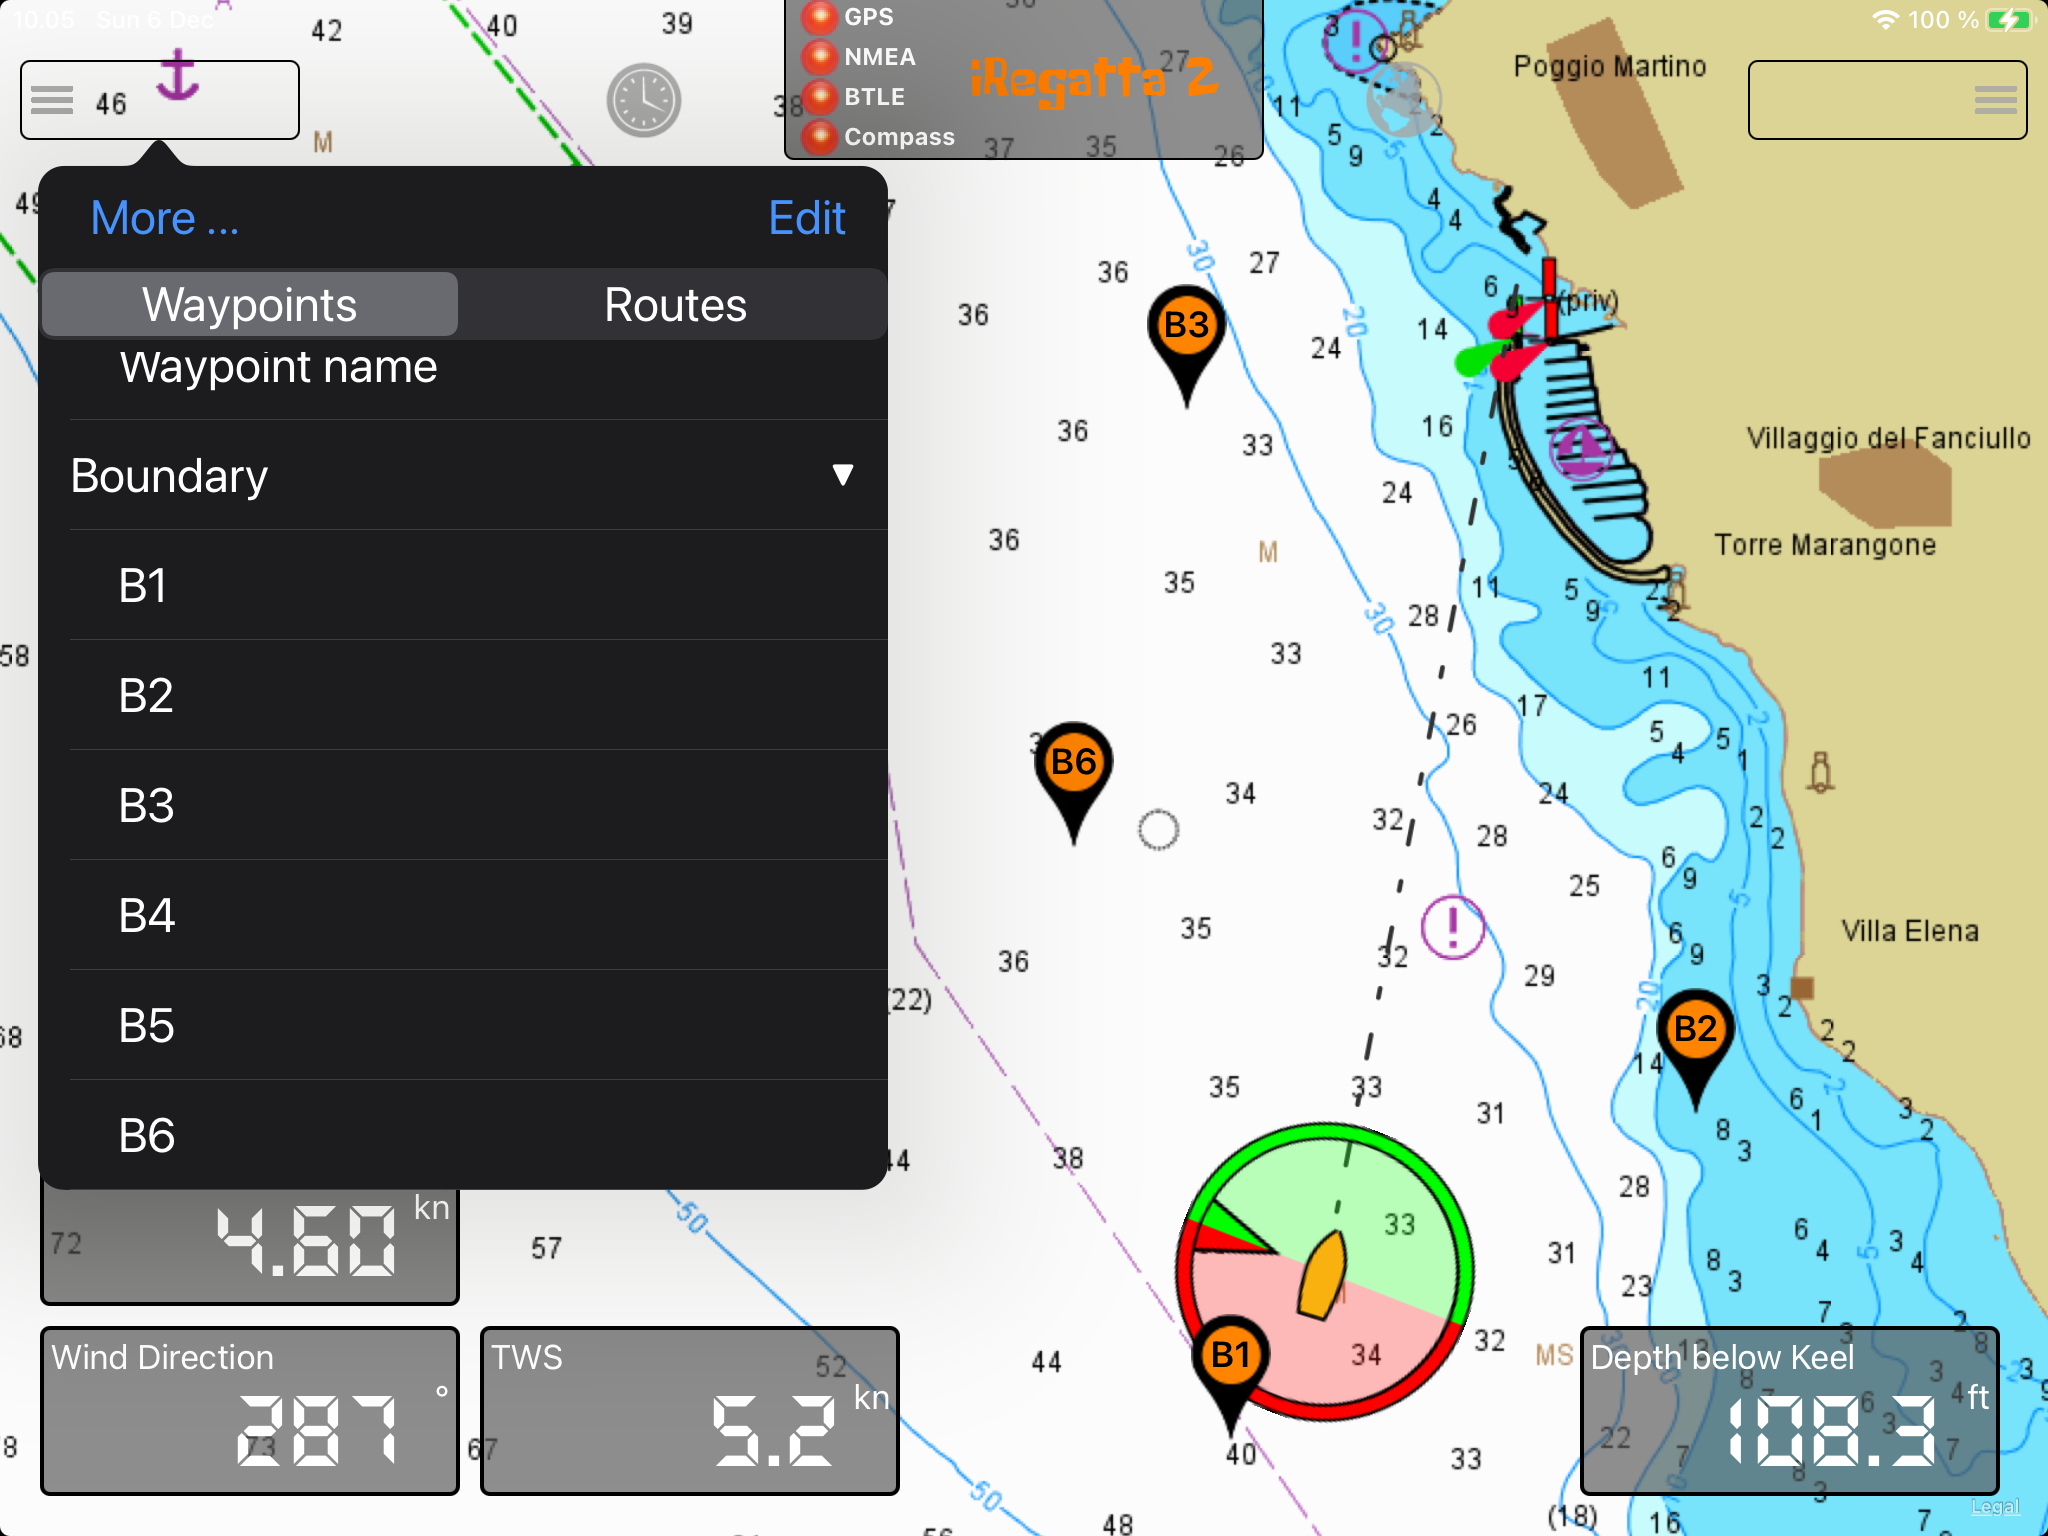
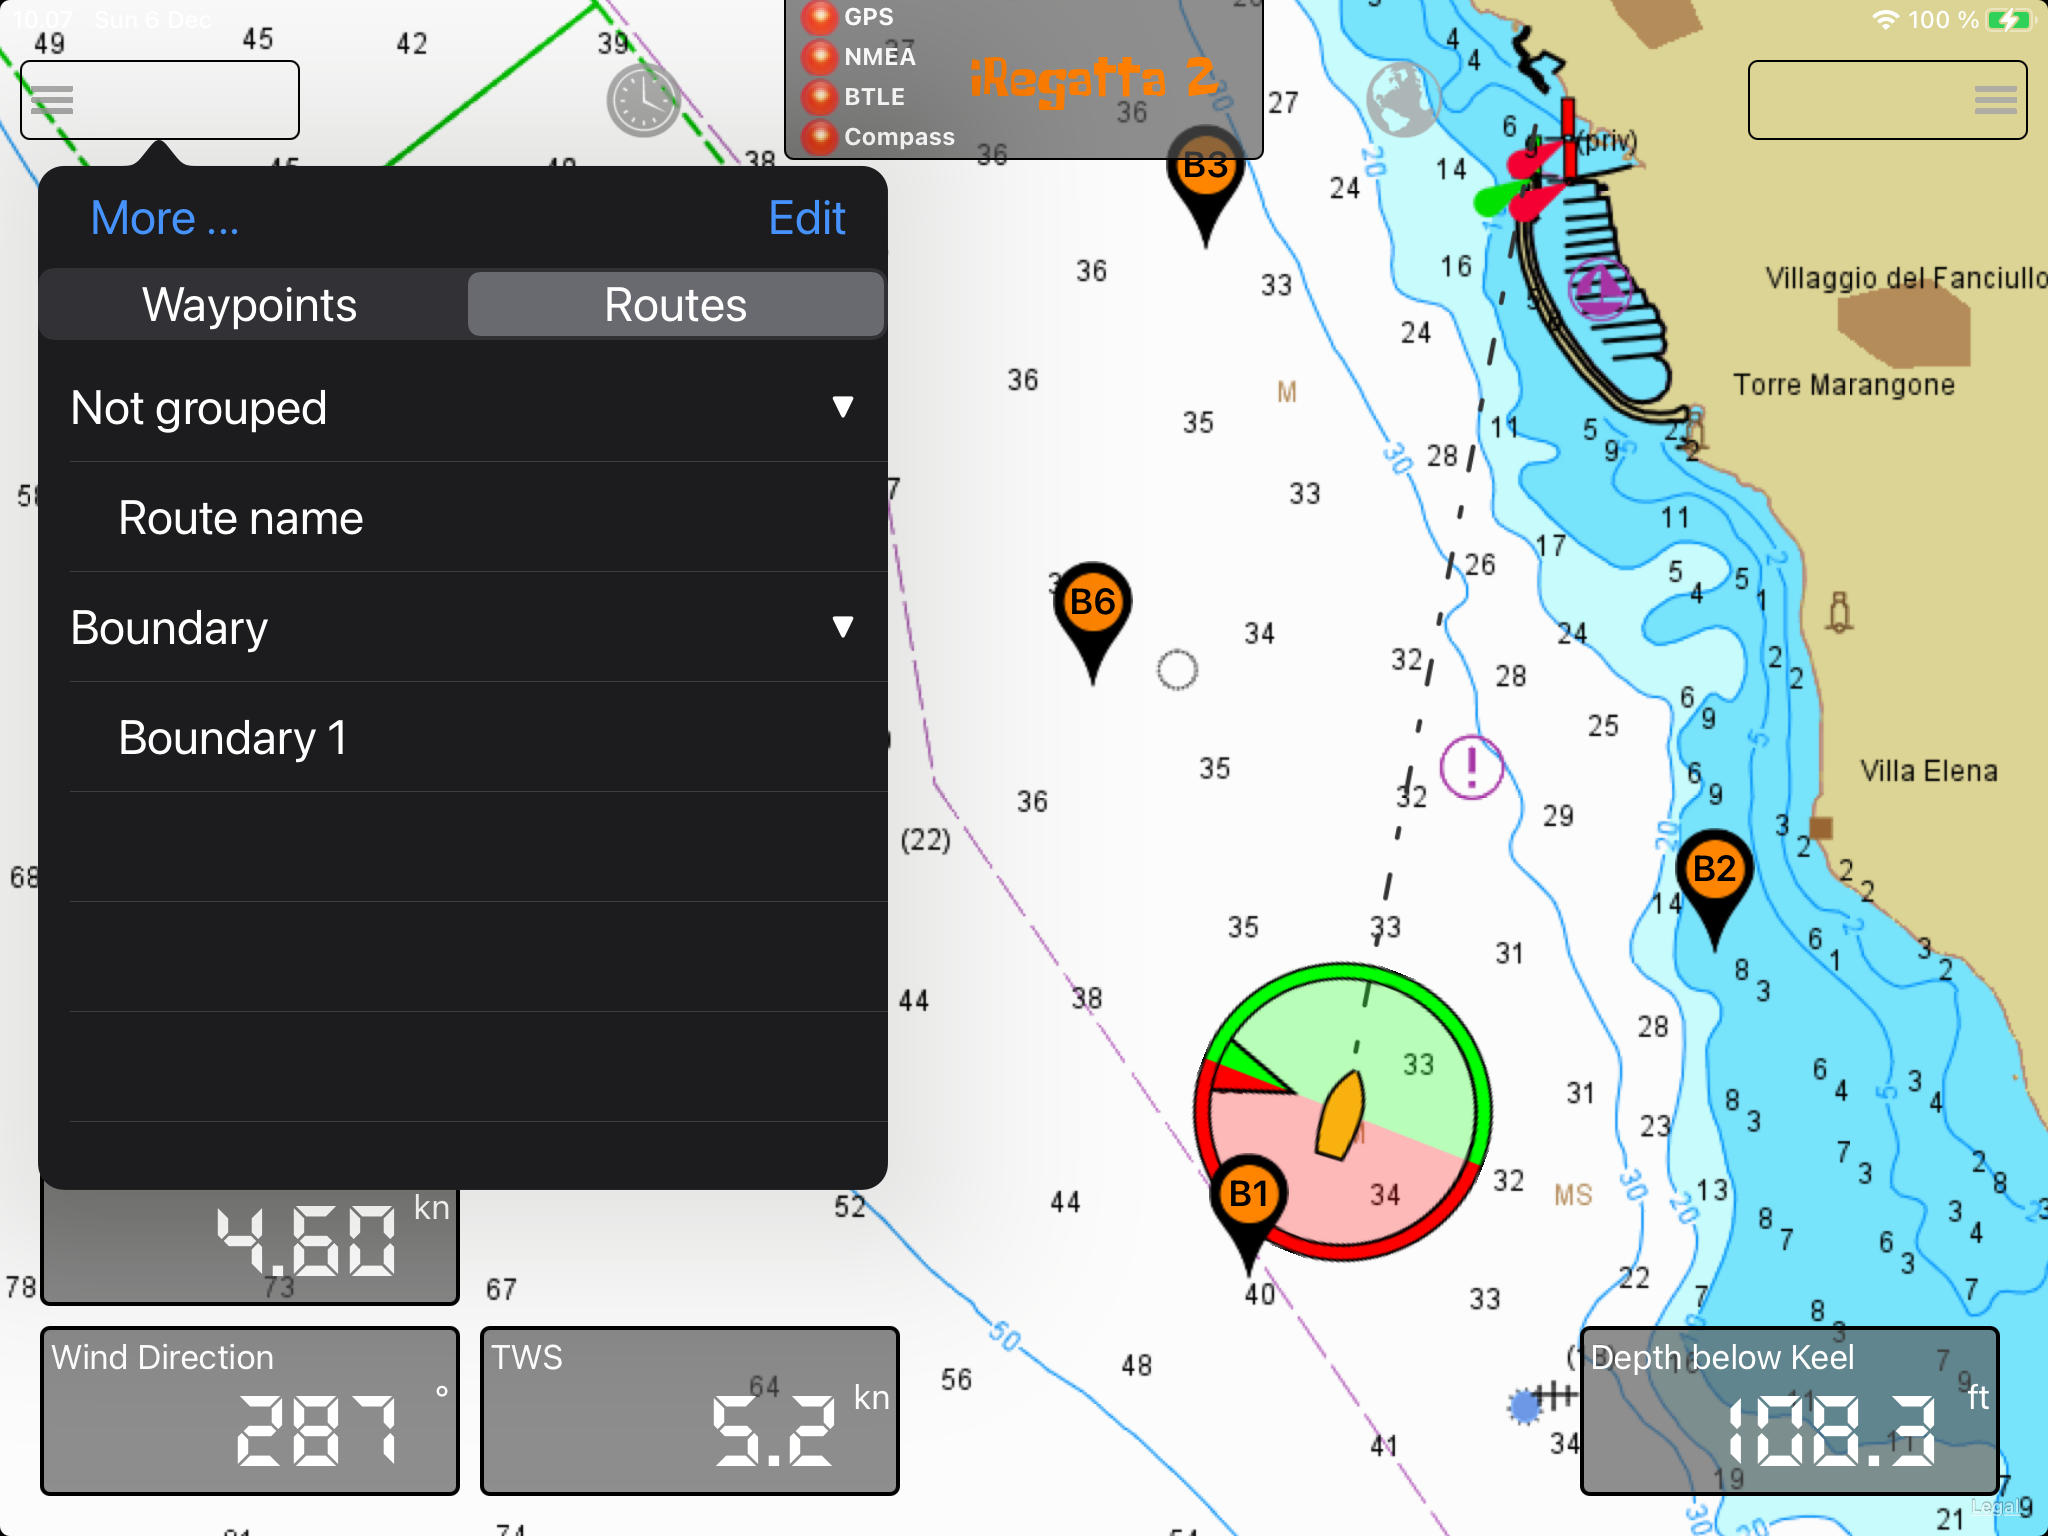
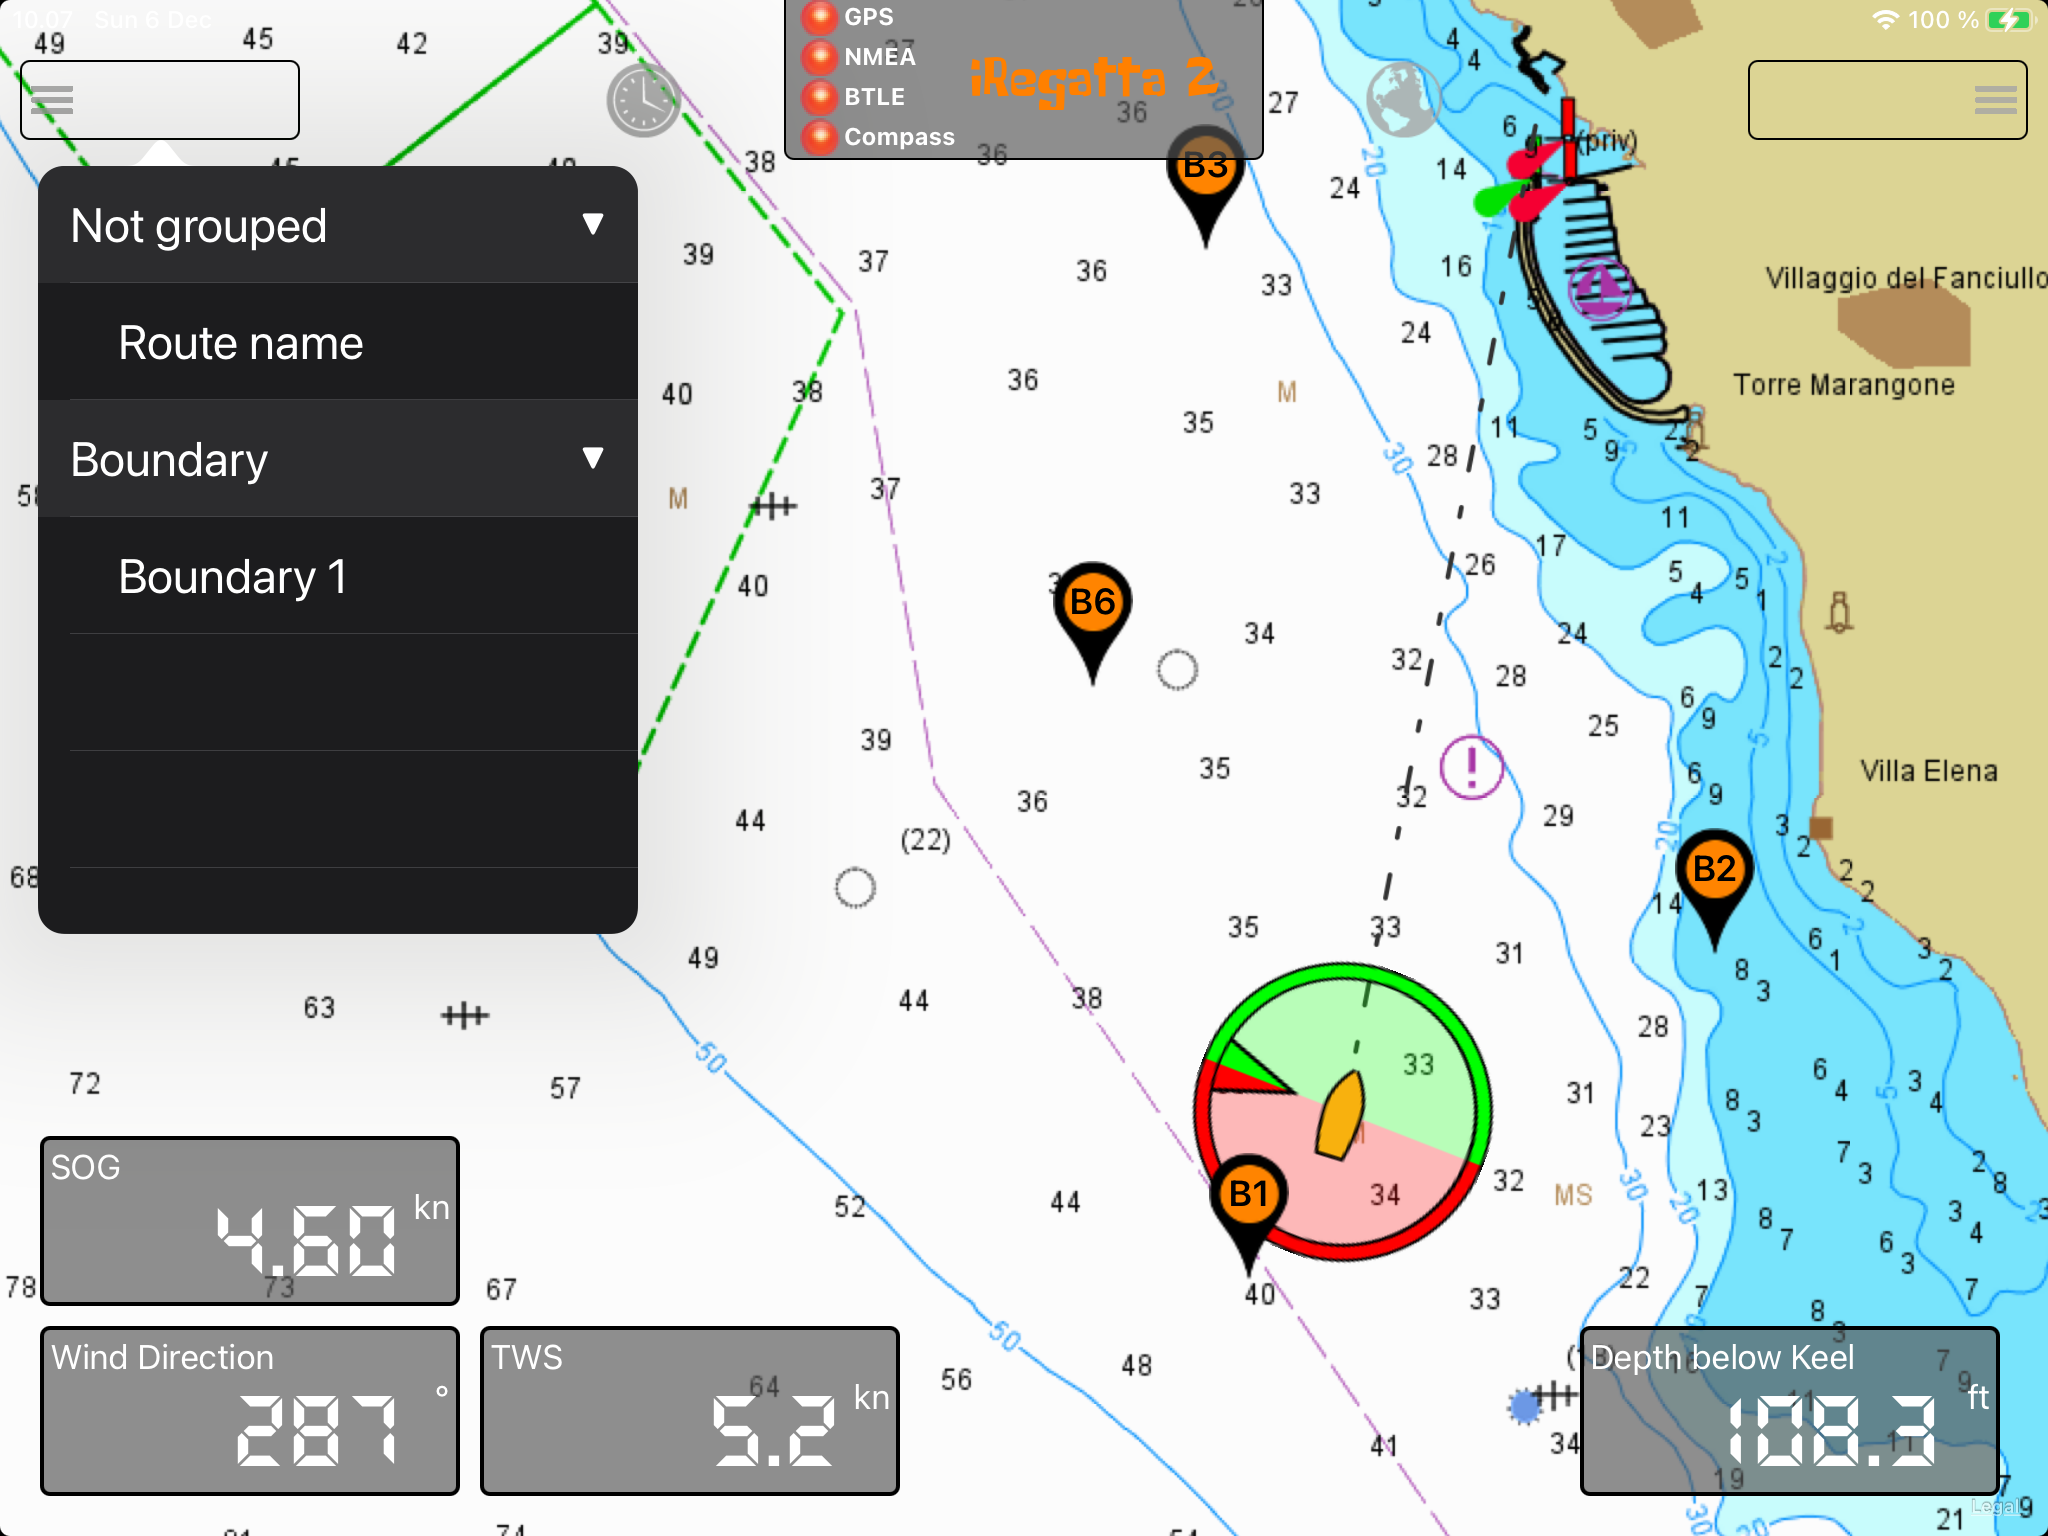
You can also manage your waypoints and routes using the “Waypoints” feature in the feature menu.
Waypoint and Route Groups
By tapping the “More...” button in the Waypoints View, you get a popup menu with additional options. If you tap “Add Group”, a new group will be added to the waypoint list. If you tap the “Edit” button in the upper right corner of the waypoint view, you can rename the group and/or drag waypoint into the groups. Tap “Edit” again to end the edit mode.
The groups are a way to organize your waypoints. You could for instance make a group for Tuesday night racing waypoint, one for a cruising trip etc.
The groups you create are also available if you switch to routes.
If you drag left on a waypoint or route in the list view, you get the option to edit or delete the item.
Export
In the “More...” menu you also have the option to export all waypoints and routes to a GPX file. You have the option to open the GPX file in another app, send it in a mail or save it on your iCloud Drive.
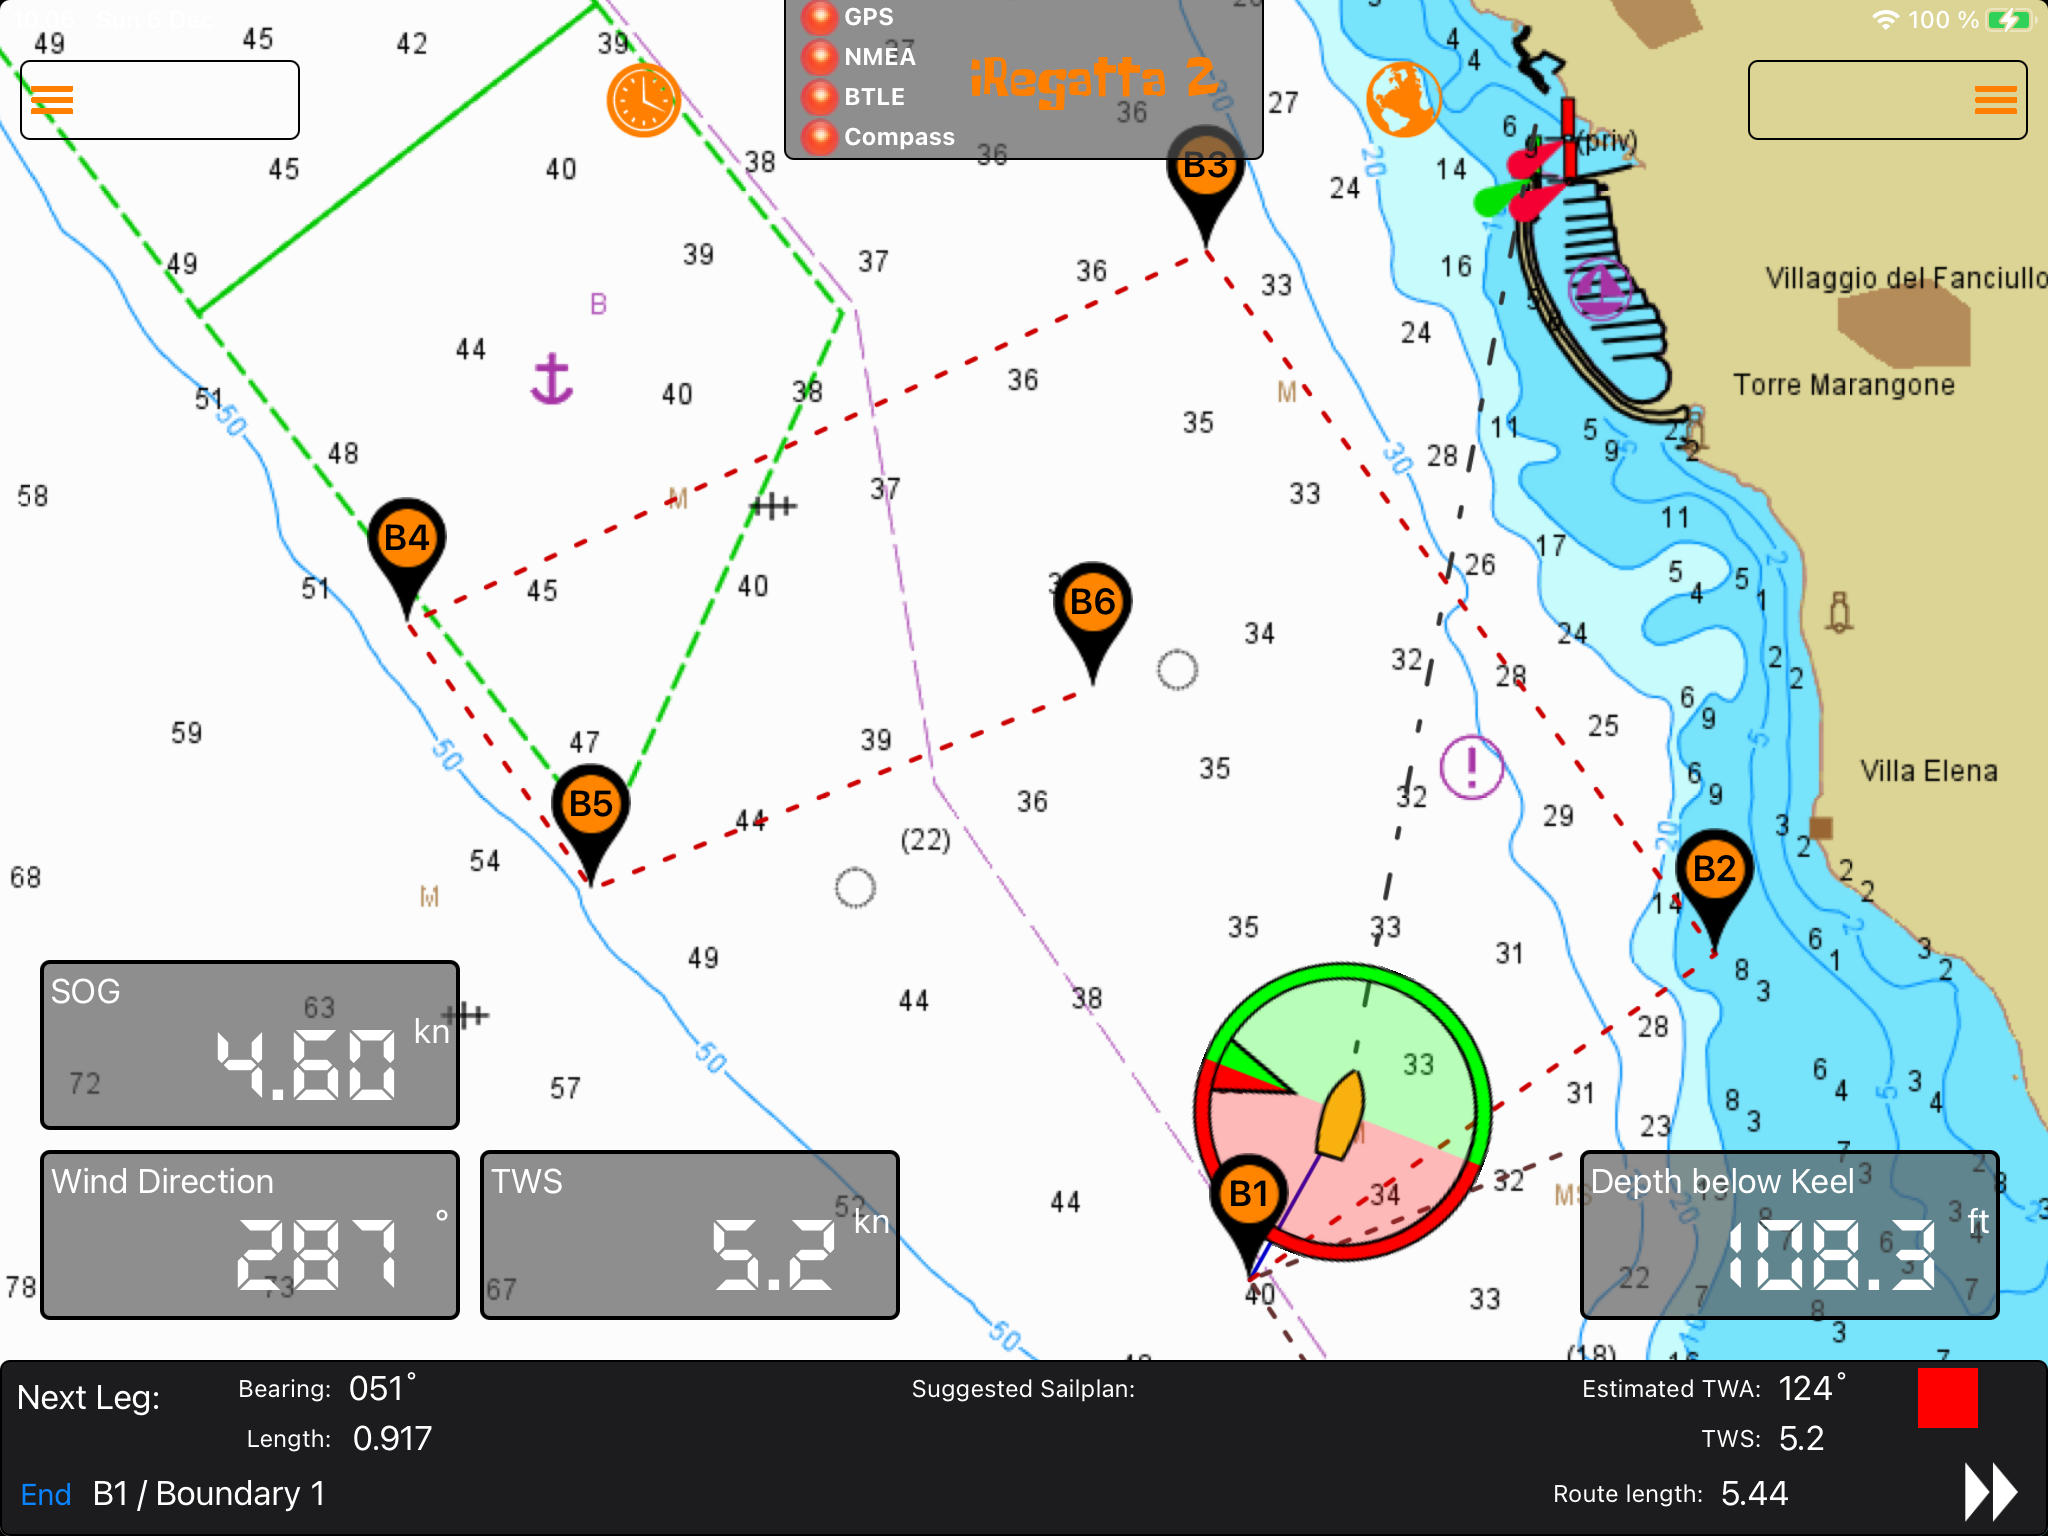
Next leg information
When you navigate a route, you’ll also see information about the next leg, so you can prepare trim and/or sail changes when closing in on next mark.
If you have polars for different sail configurations and have added them to a sailplan, you can also see which sail configuration iRegatta 2 would suggest for next leg, based on estimated TWA/TWS and your polar files.
To help you decide if it’s worth a sail shift, you can tap the matrix button which will show you which sail configuration is the fastest in different TWA/TWS combinations. In the lower right corner of the popup it also shows performance differences in percentages for the estimated TWA of next leg, to support you in your decision making.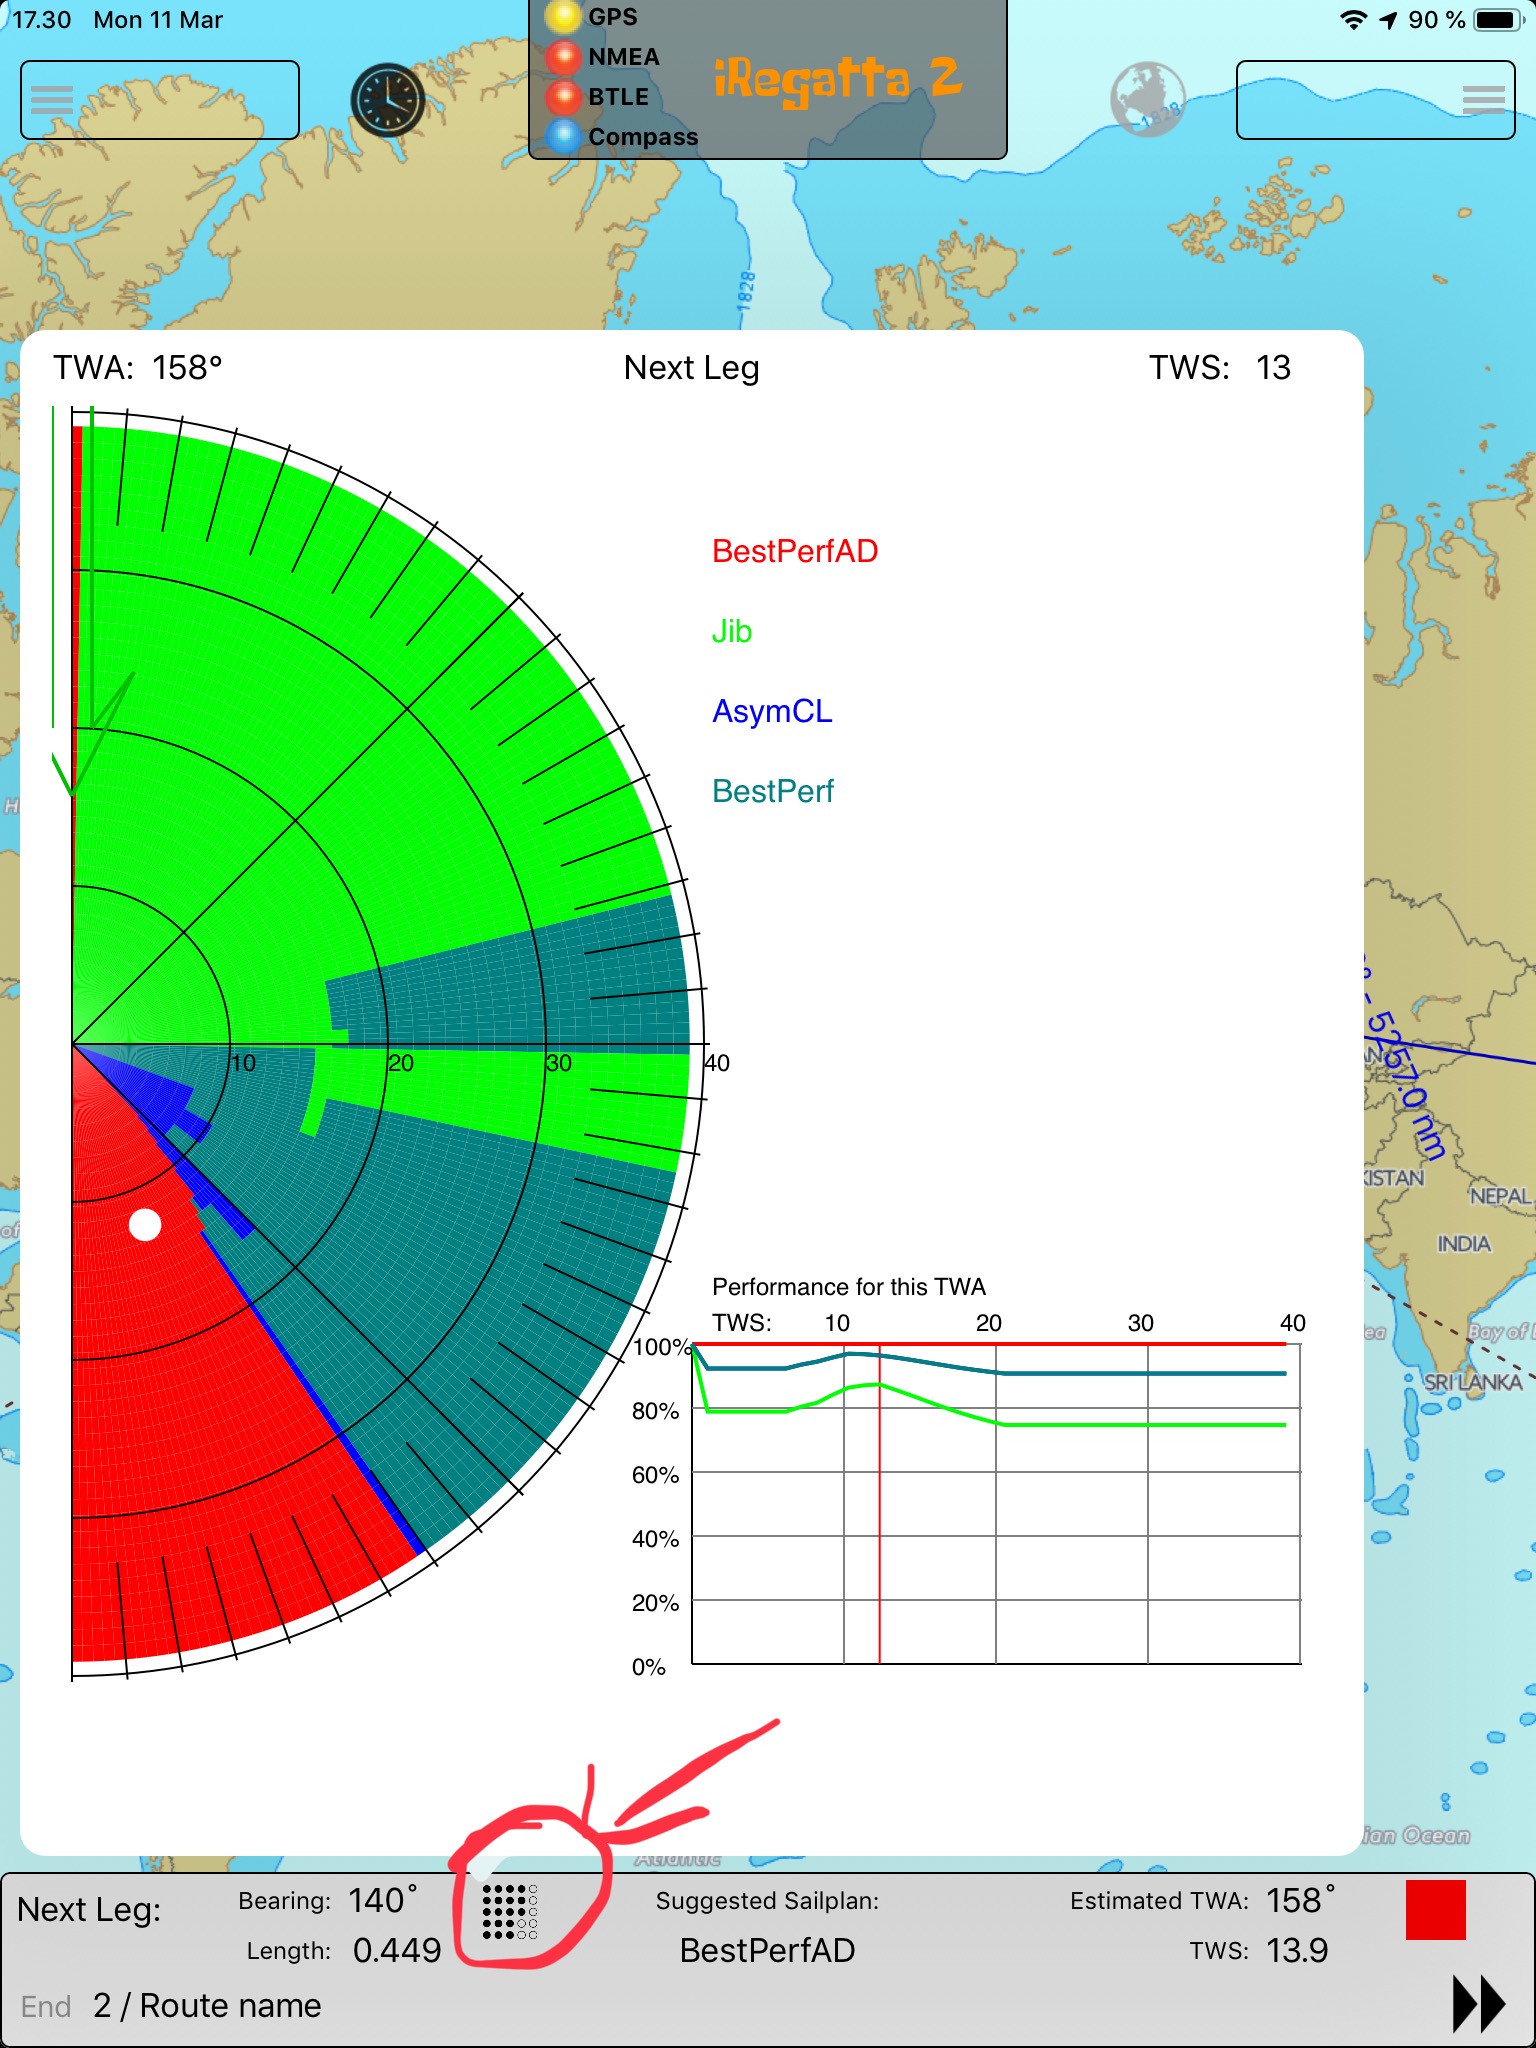
Tracking
In the feature menu you find tracking. This feature is used to track races for later review, export or analysis.
After selecting the tracking feature in the feature menu, a list view will show. At the top of the list you can chose to start a new tracking, or end an active tracking session.
While tracking, not only position and time is stored, but also all available instrument and performance data.
Once a track is recorded, it will show up in the list along with date of the tracking and number of points tracked.
In the iRegatta 2 settings, you can chose how often you want to store a tracking point. For detailed race analysis it’s recommended to store track points every second, to be able to analyze wins and losses in tacks and gybes.
For a long distance race or all day cruise, it’s better to store track points less frequently, to save storage on your iPad.
If you tap on a track in the list, it will show on screen, and the map will adjust to show the area of the track.
To return to normal racing mode, tap the “Exit Track” button at the upper left corner of the screen.
In the lower right corner you can tap the “Export” button to export the track file to iCloud Drive or other applications. You can for instance export all data to a CSV file to import it into your favorite spread sheet to do your own customized analysis.
You can also tap the “Analyze” button to let iRegatta analyse your track file.
If you pinged the line and ran a start count down during the tracking, the analysis will be trimmed to start at race start. First information will be by how much you where early or late at the start.
The remaining track is devided into up- and downwind legs.
For each leg you can see it’s duration, average performance compared to your polar files and numper of tacks or jibes.
If you tap on a leg in the list, it’ll show performance details on each maneuver and stretches in between.
If you tap on an maneuver, you’ll see a detailed analysis of the maneuver and if you gained or lost distance in it. IRegatta 2 will take your speed and course 30 seconds before your maneuver and calculate where you would have been 30 seconds after the maneuver and compares that to your actual position 30 after the maneuver. The measurement is done parallel to the wind direction.
Polars
To get the best feedback on performance and laylines etc., you need to install a suitable polar file in iRegatta 2.
On the Zifigo.com website you’ll find a selection of polar files supplied by other iRegatta users.
You can either use these, create your own or record a polar while sailing. If you have a CSV file in the right format, you can mail it to your iPad and open the attachment with iRegatta 2 to import it, or you can save it on your iCloud drive and use the “Import” feature in the iRegatta 2 feature menu.
Already installed polar files are available when tapping the “List” button in the upper right corner of the polar view.
If you tap a polar in the list, it will be read and used as current polar.
Polar files are used to calculate tack and jibe angles, laylines to waypoints and performace data. It’s therefore important to have good polar files to get good feedback from iRegatta 2.
In the lower left corner of the polar view, you can choose to update the polar file with your actual speed while sailing. It’s advisable to only turn on polar update while sailing at more or less constant TWA. A boat going through a tack will record data of going at good speed directly against the wind.
In the settings you can choose if only higher speeds should update the polars, or also lower speeds should modify the polar file.
To avoid short peak speeds to influence the polar recording, each update only increases the polar file by 10 %. This means if the polar has the value of 5 knots for a given TWA/TWS combination, and current speed is 6 knots, the polar value will be i creased to 5.1 knots. At the next 6 knot reading for that TWA/TWS combination the polar value will be increased to 5.19 etc. So eventually the polar file will end at 6 knots, if that speed is constantly achieved.
If you have several polars for different sail configurations, you can group these into a “Sailplan”. In the polar list tap the “Add Sailplan” to create a new sailplan. Tap the “Edit” button in the upper right corner and drag the polar files you want to add to you sailplan into your sailplan group. Exit the edit mode again and tap on your sailplan to activate it instead of just activating a single polar.
Race Control
The Race Control feature will allow several iPads to connect and let a Race Committee remote controll the participants start count down, share wind information (if the participants don't have NMEA wind data) and even set out a race course boundary, as you've seen it in the Americas Cup or the SailGP series.
Requirements
For this to work, all iPads need to have a SIM card installed and mobile data enabled, and as iCloud is used for the data sharing, they all need to be logged into iCloud with the same account.
IMPORTANT, your SIM-provider might charge you for mobile data-traffic.
How it works
The iPad that is set up as Race Manager will store information about boundary waypoints, startline ends, start count down and wind direction and speed in iCloud. The participants iPads will get a notification every time information is changed in iCloud, and will then read them from iCloud.
Boundary and start informations are uploaded to iCloud on every race manager action, while wind data is updated every 10 seconds.
The Race Manager can control which data to share (Start, Wind and/or boundary). If the Race Manager decides to share Start, the start button on the participants iPads is removed, and will now be remotely controlled by the Race Manager.
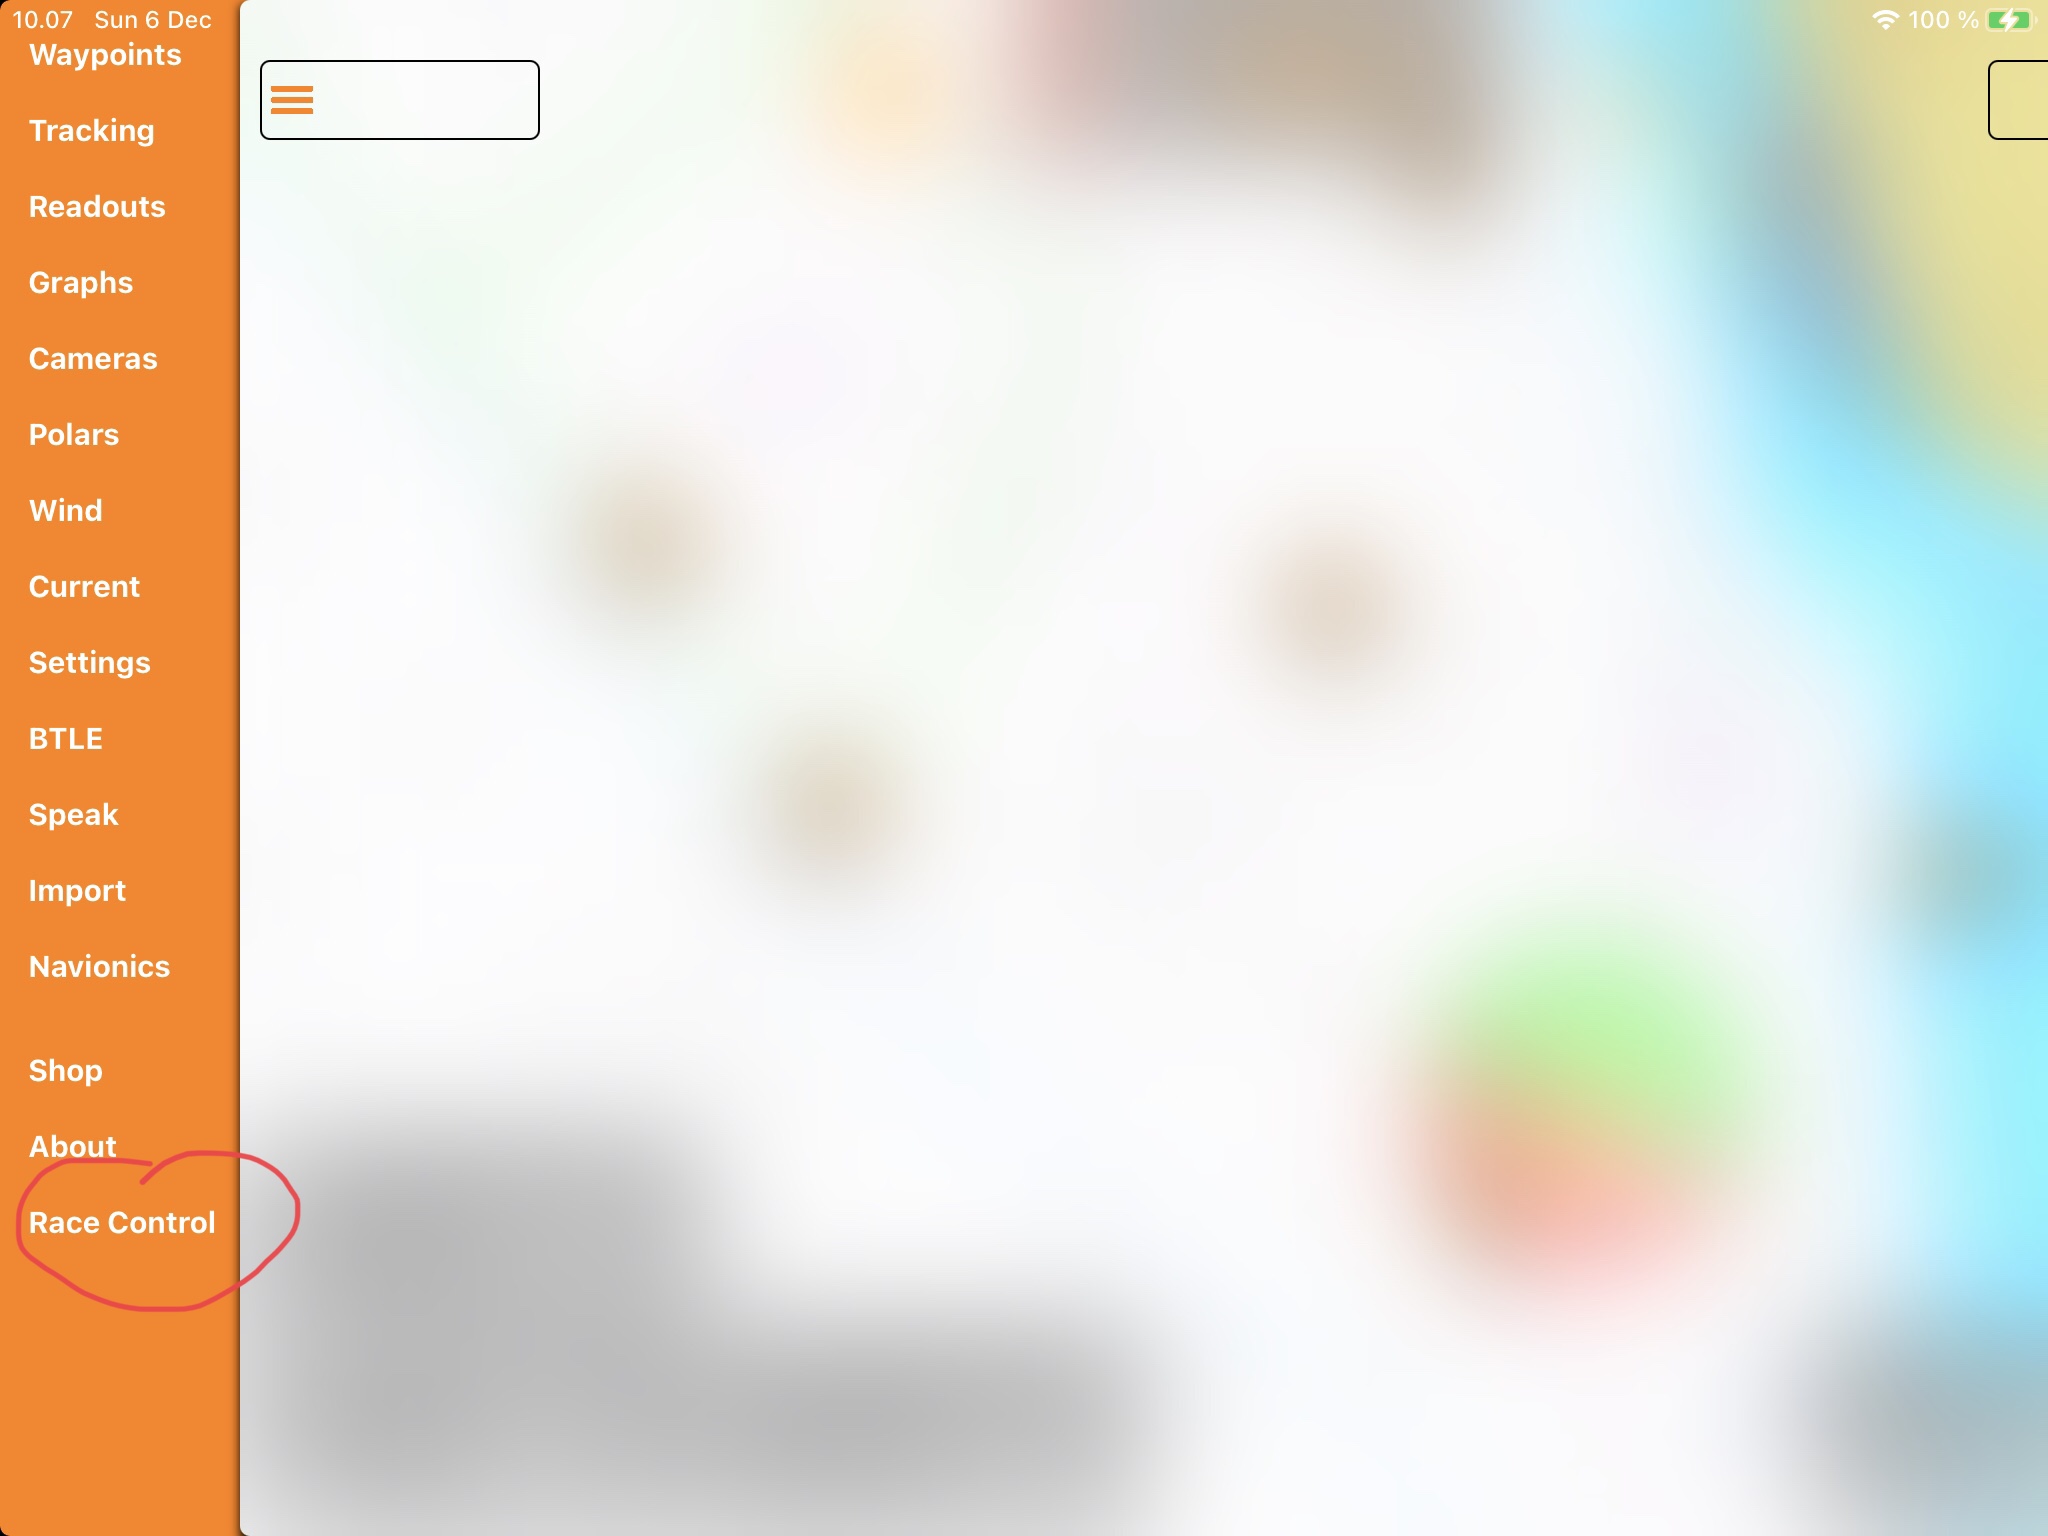
Setup Race Control
Open the left menu and scroll all the way to the bottom to find the "Race Controll" feature. Tap it to open the Race Controll view.
First you can turn on/off the usage of the Race Control functionality, and next you chose if you are the "Race Manager" or a "Participant".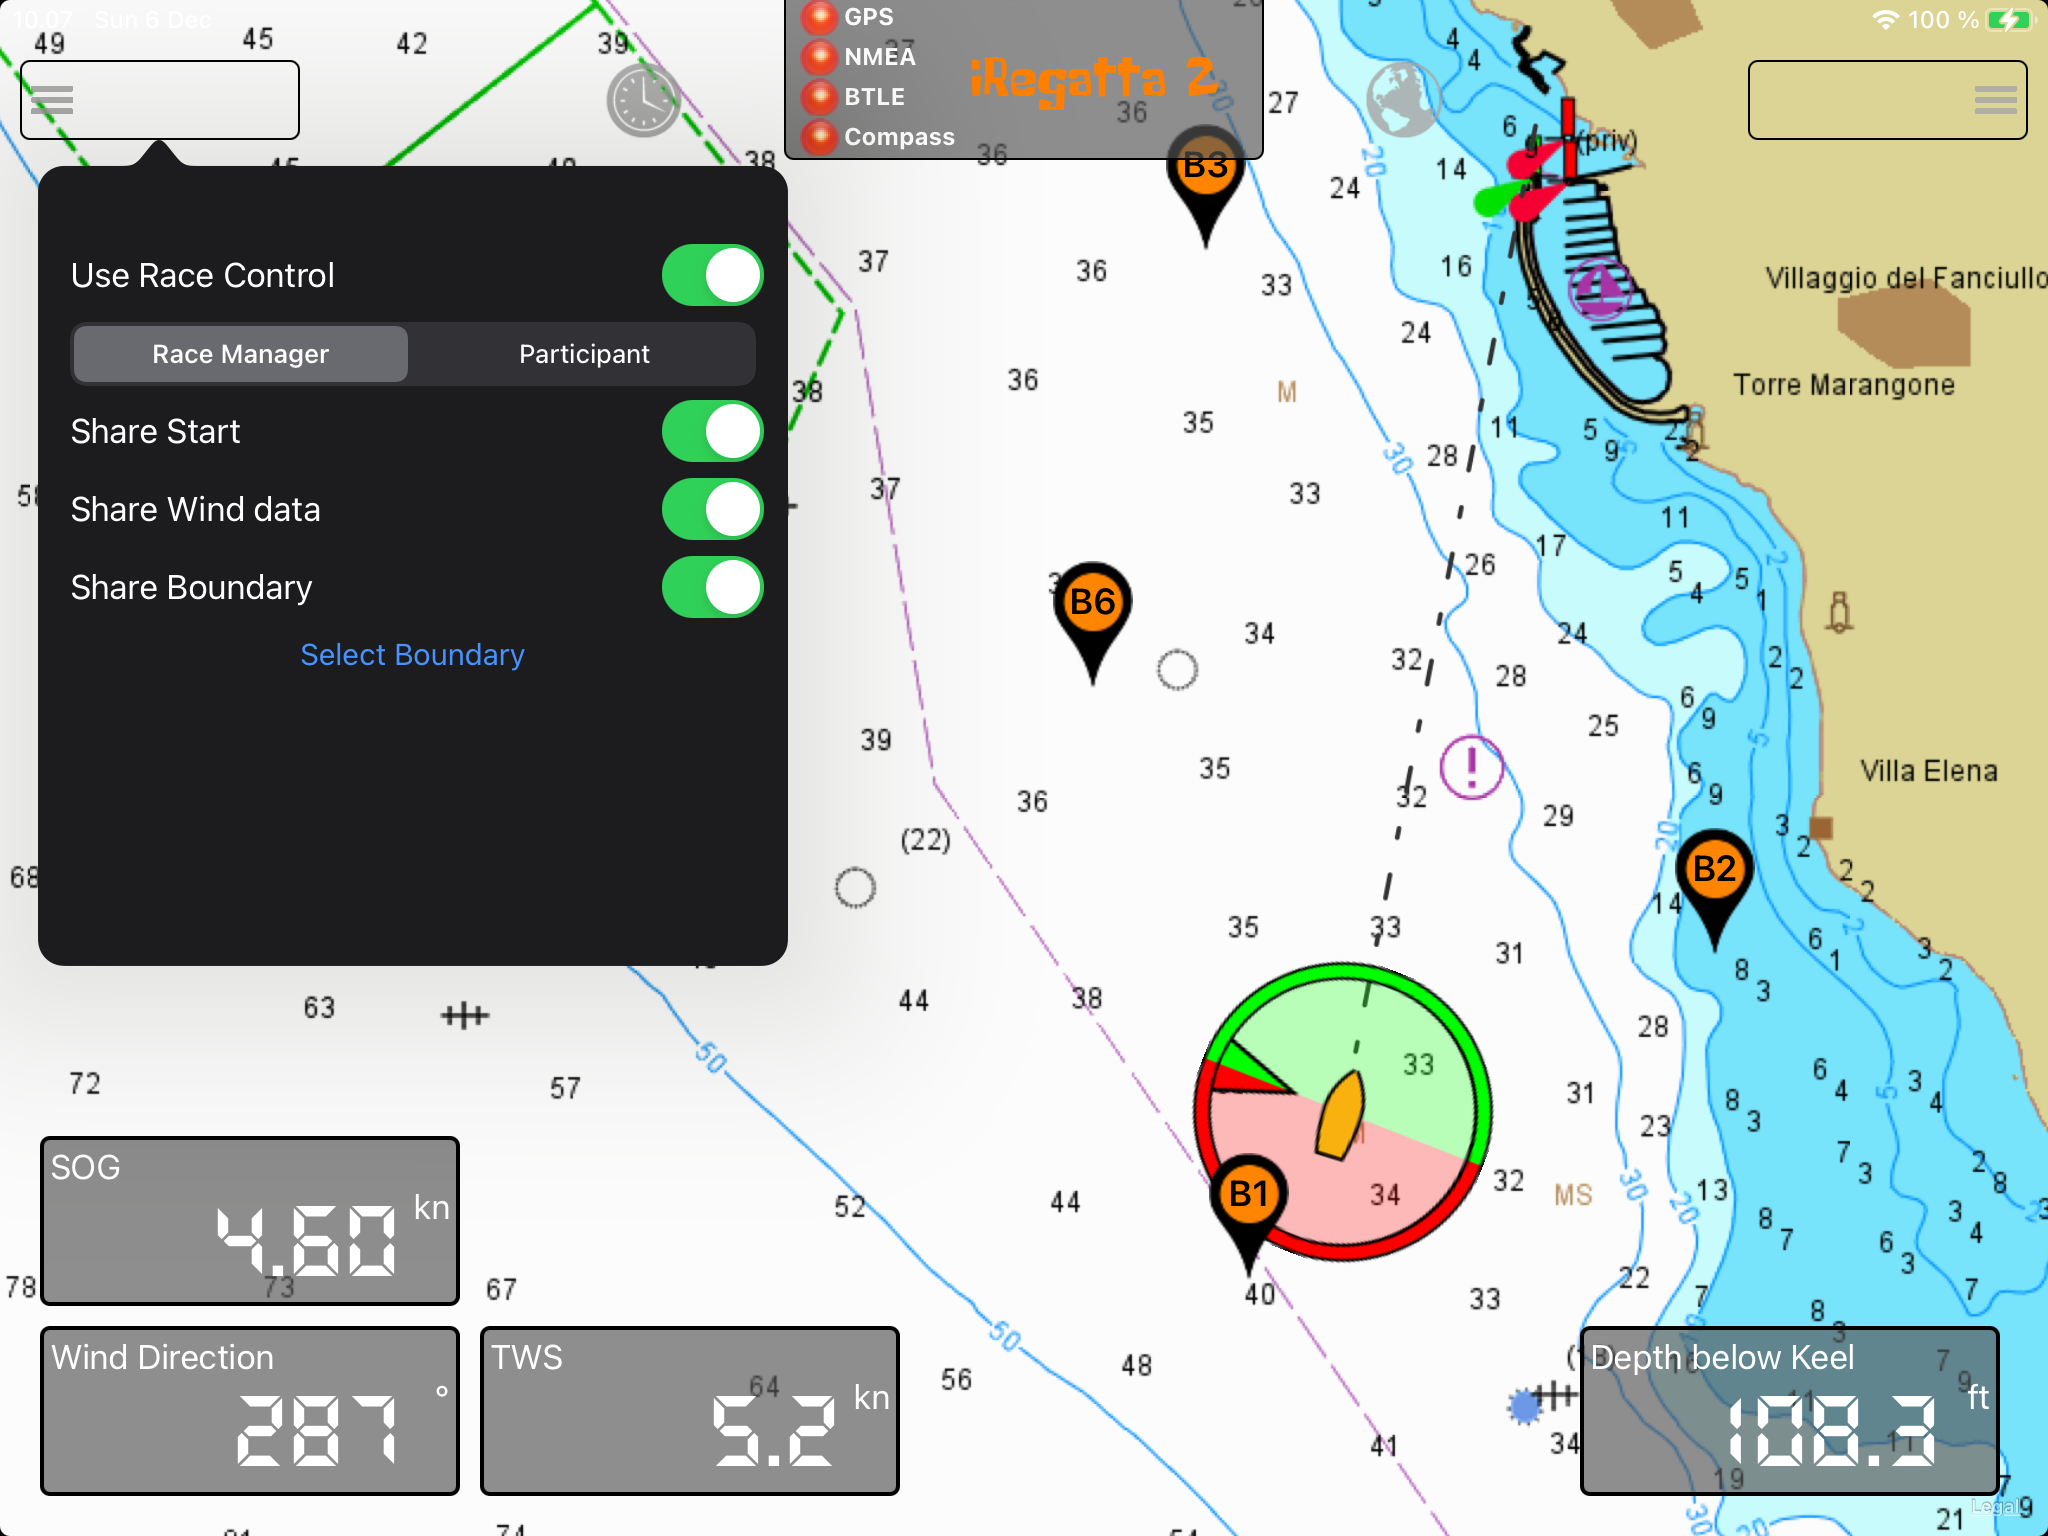
If you choose to be a participant you're done, tap outside the view to dismiss it.
If you are Race Manager, you also need to choose which informations you want to share with the participants.
- Share Start, startline ends and the count down will be managed by the Race Manager and shared with all participants. Once the count down is started, all participants iPads will shift into the start view and show the line and the count down.
- Share Wind data, wind speed and direction from the Race Manager iRegatta2 is shared with the participants. This is especially useful if participants don't have anemometers on their boats.
- Share boundary, if you set up a race course boundary, this can be shared with the participants as well.
Setup Boundary
Setting up a race course boundary is as easy as creating a route.
- First you create waypoints for the corners of the boundary.
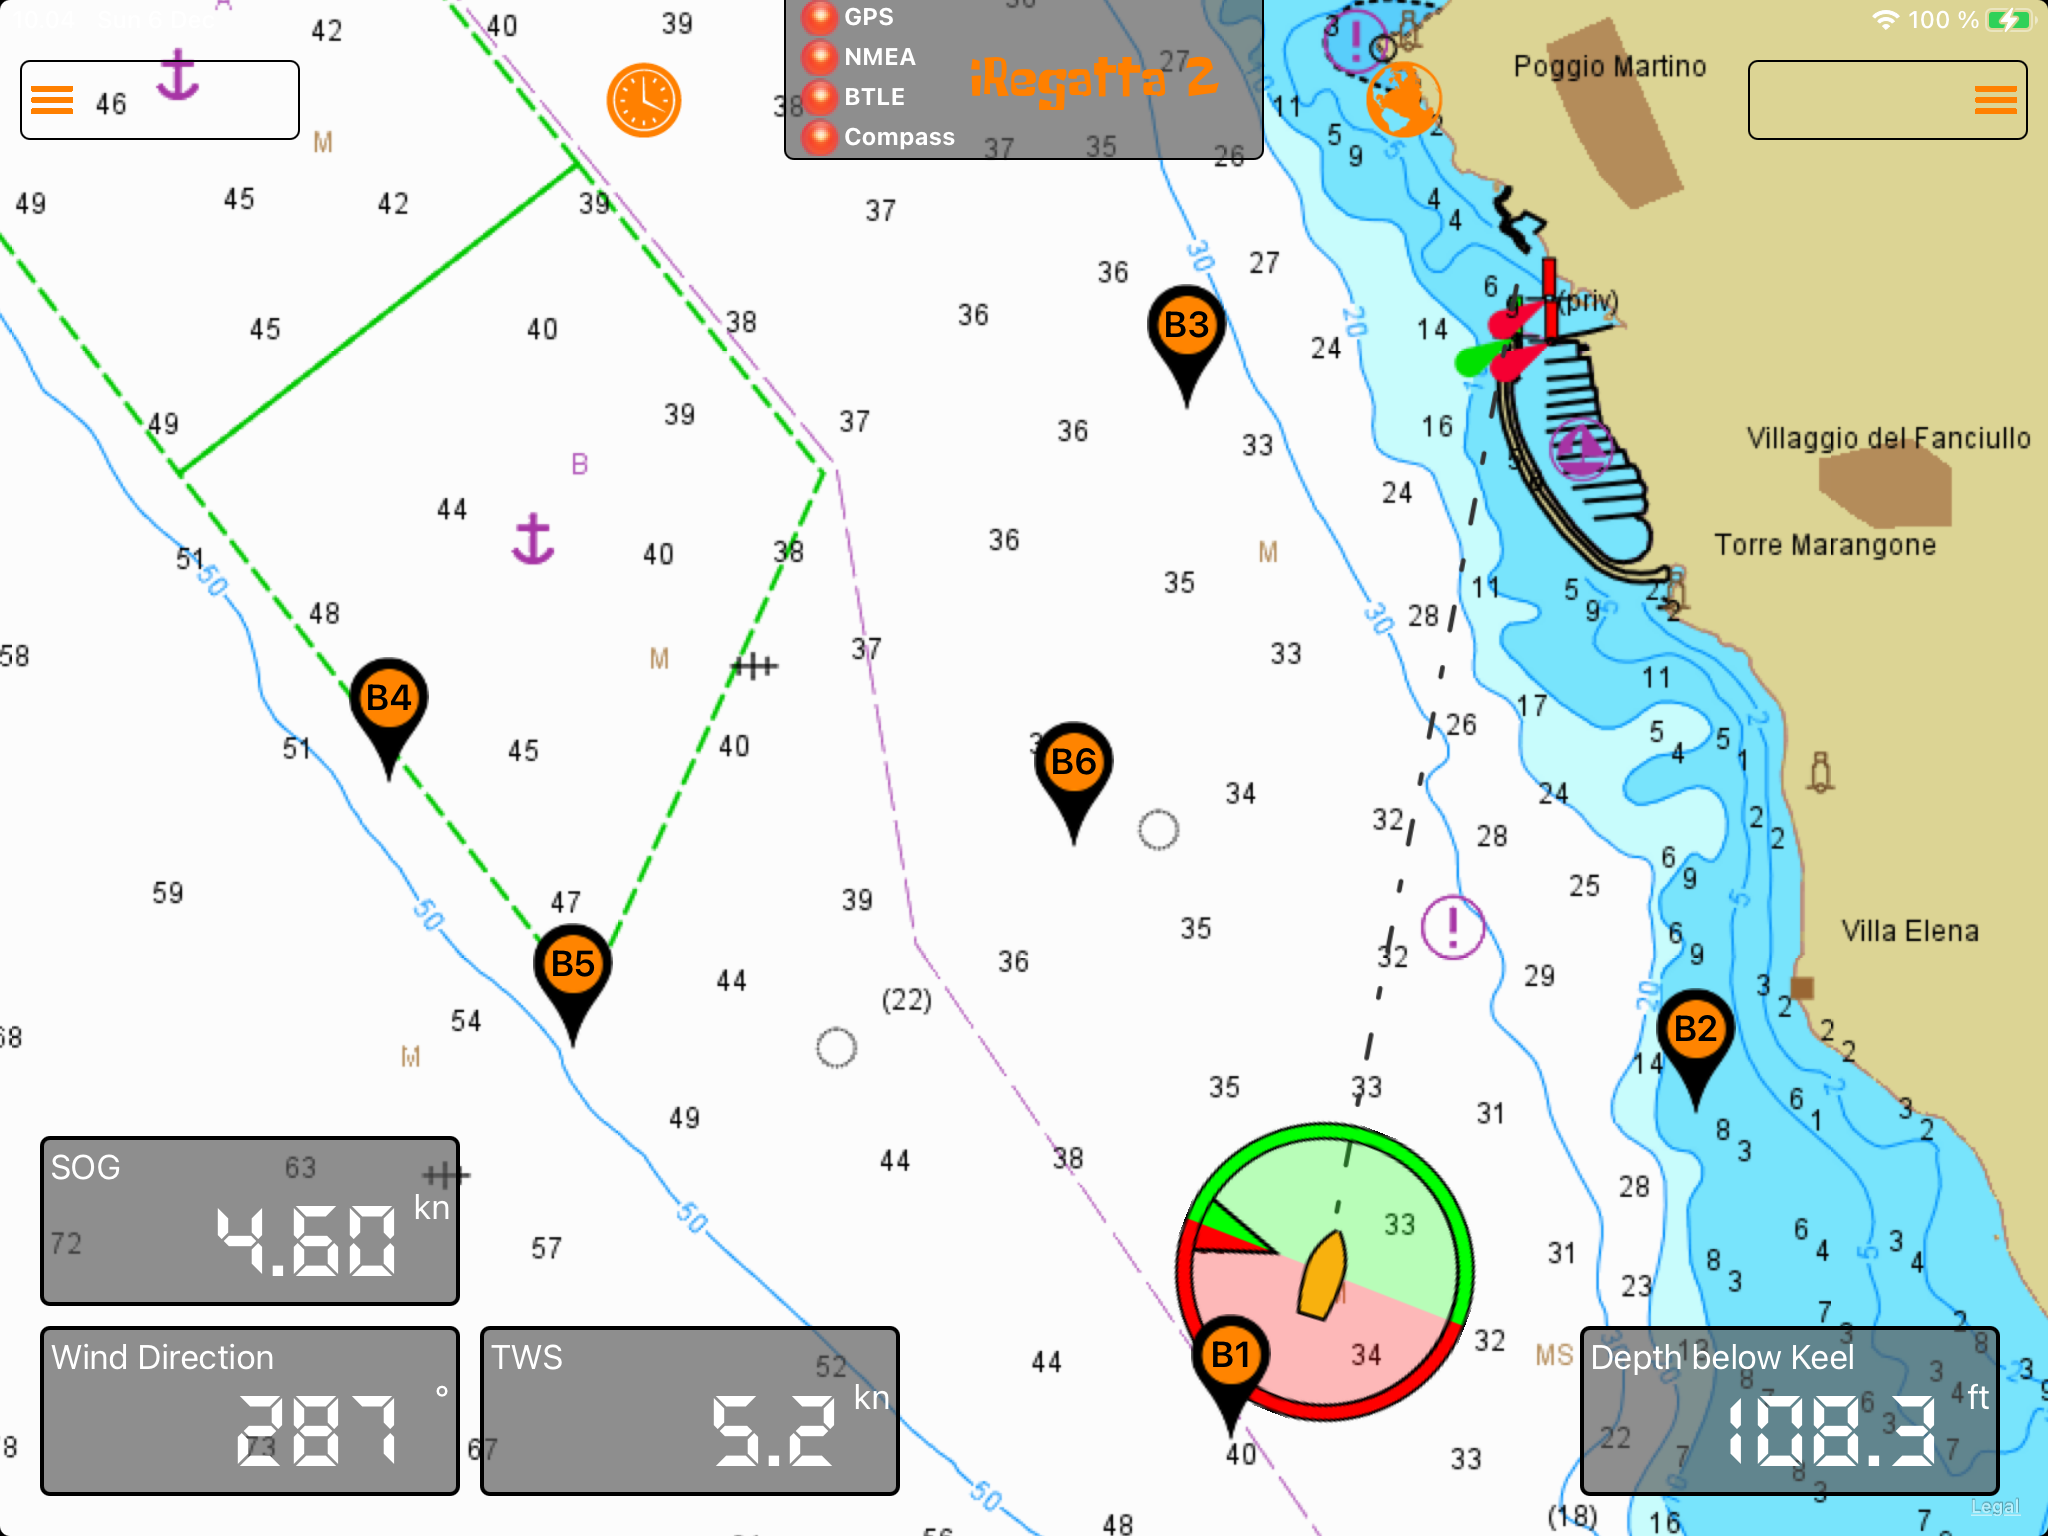
- (OPTIONAL) you can create a waypoint group for the boundary waypoints, for better overview.
- Create a route creating a boundary around the race course using the boundary waypoints.
- (OPTIONAL) again, you could move the boundary route to the boundary group.
- In the Race Control view, tap the "Select Boundary" button, and chose the boundary route you created.
Now the boundary will show up in the map. The boundary will be green if you are inside the boundary and red if you are outside.
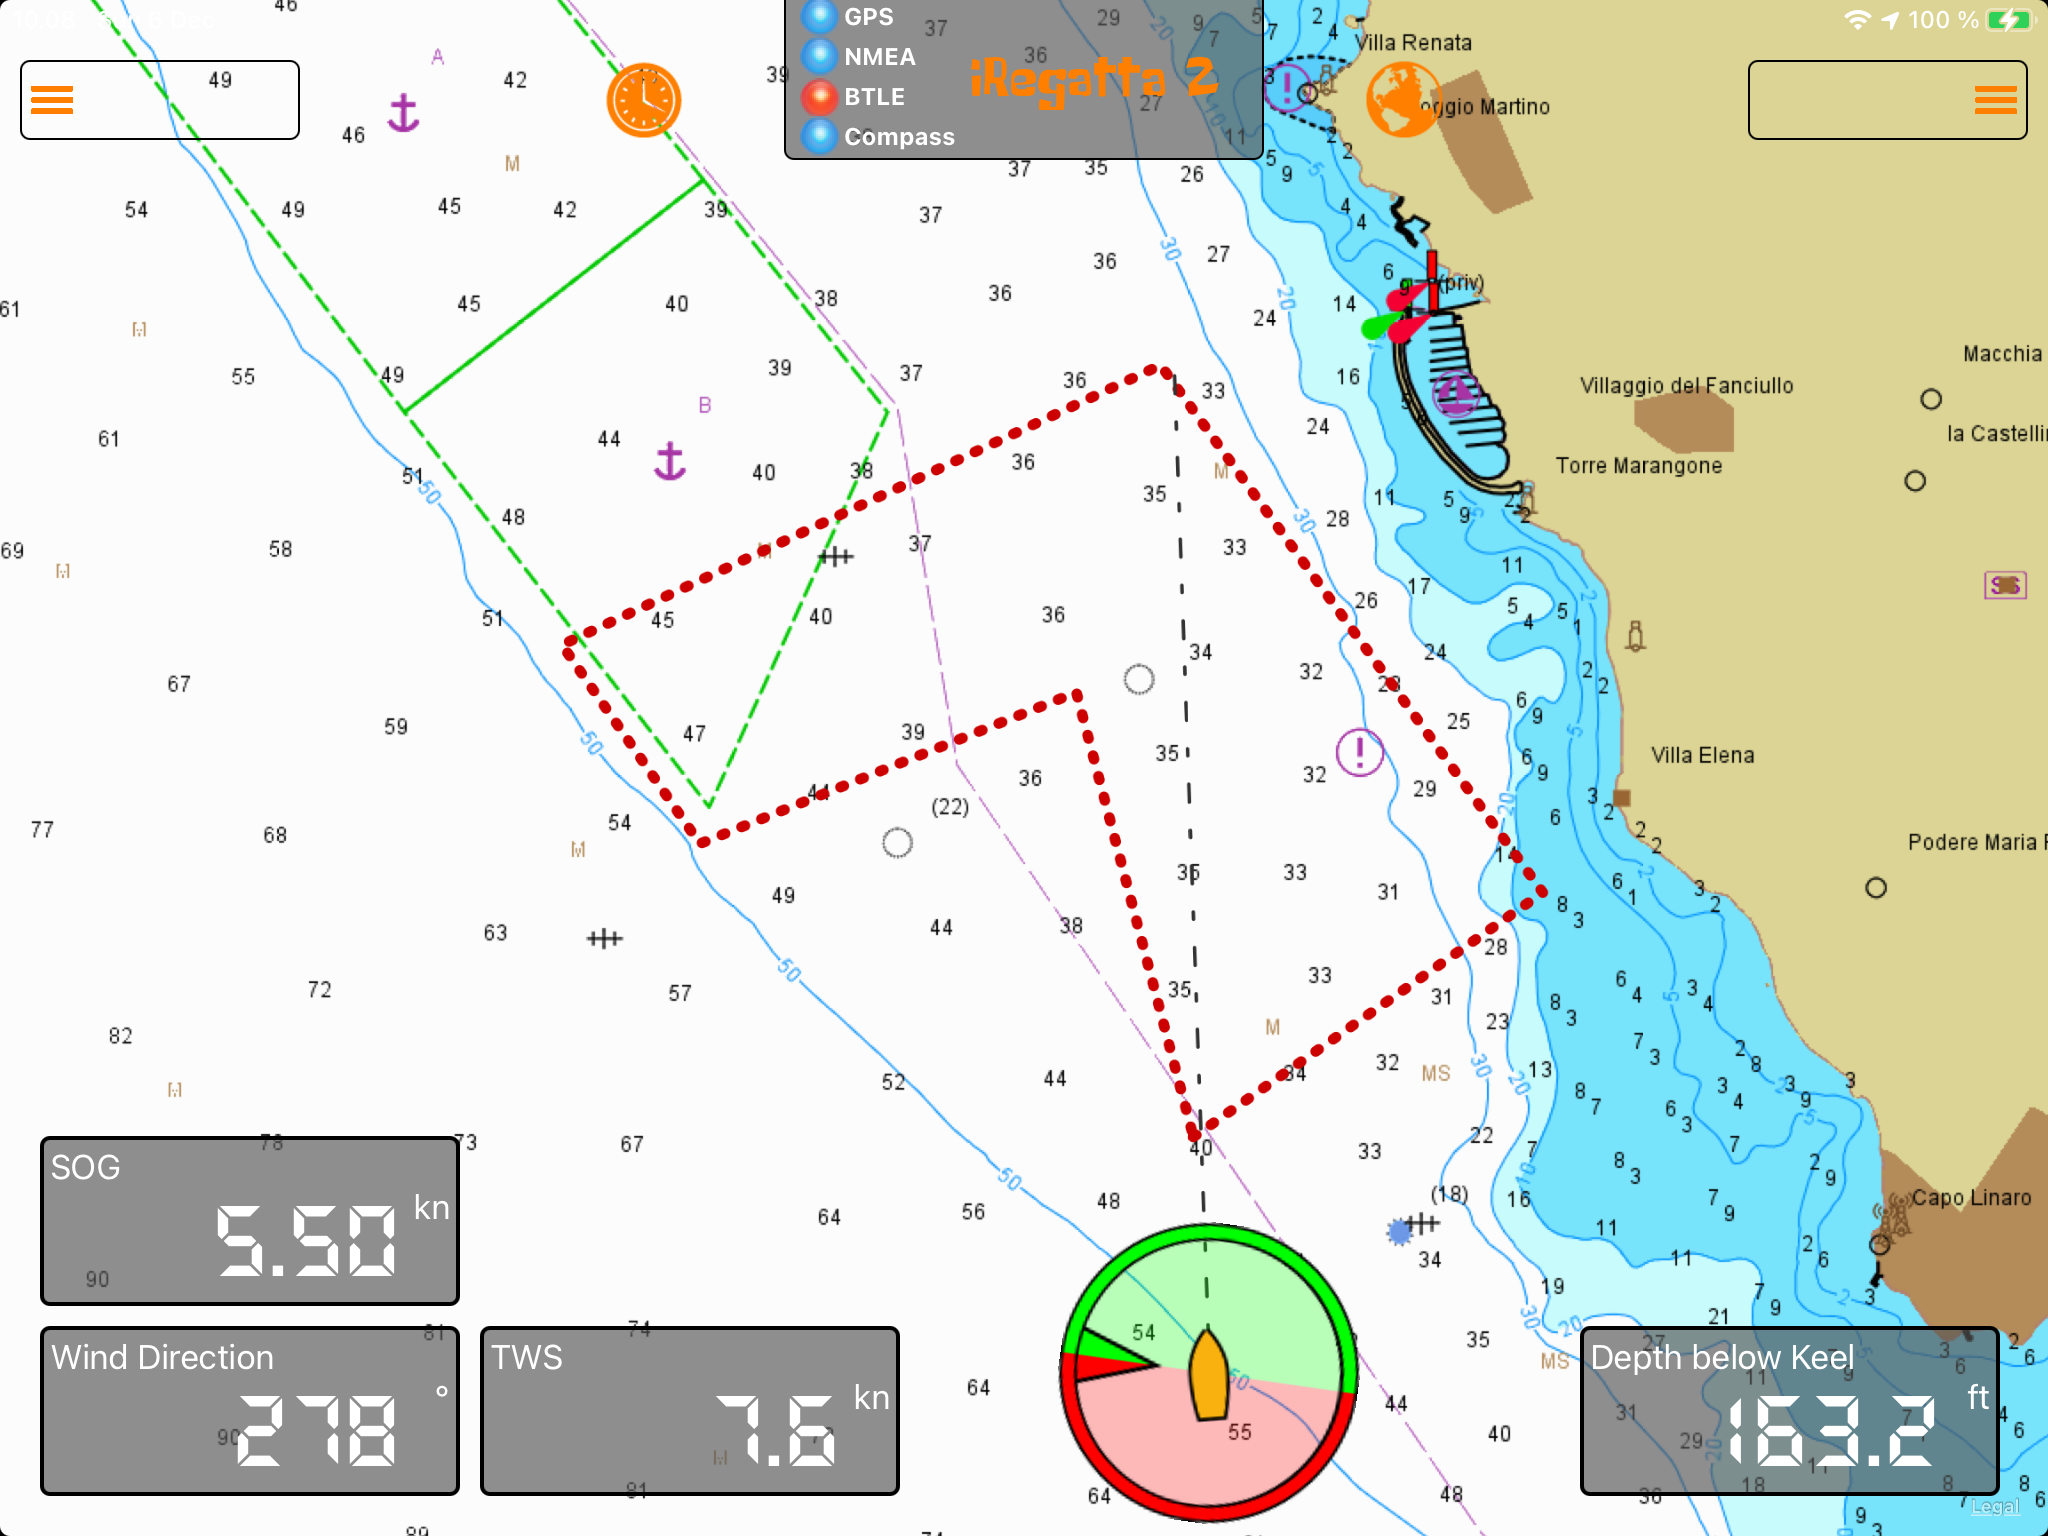
NOTE: You can also use the boundary as a feature without using Race Control.
To remove a boundary, simply re-enter the boundary selection view, and tap outside the view to dismiss it without choosing a boundary.